Restoring a Giannini Craviola 12 String
Saving a guitar from the fireplace

Giannini is, believe it or not, a Brazilian guitar company. It was started by an Italian immigrant and luthier, Tranquillo Giannini, who found that Brazilian rosewood and Brazilian mahogany (which is the same species as the kind that grows in Honduras) made pretty good tone woods. The company is still going today.

Paulinho Nogueira was a Brazilian composer who designed a guitar he called a Craviola. The name, a portmanteau of ‘cravo’, the Portuguese word for harpsichord, and ‘viola,’ is meant to represent the sound the guitar makes, which sounds like a combination of both instruments.
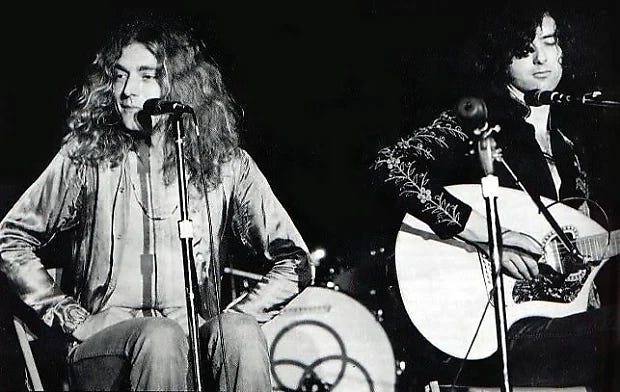
For most people, the only Craviola they may have seen or heard was the one used by Led Zeppelin guitarist Jimmy Page. He used the Craviola early in Led Zeppelin’s career, and it can occasionally be seen in the hands of other band members:

Page used the guitar on 1970’s “Tangerine” as well as for live performances.
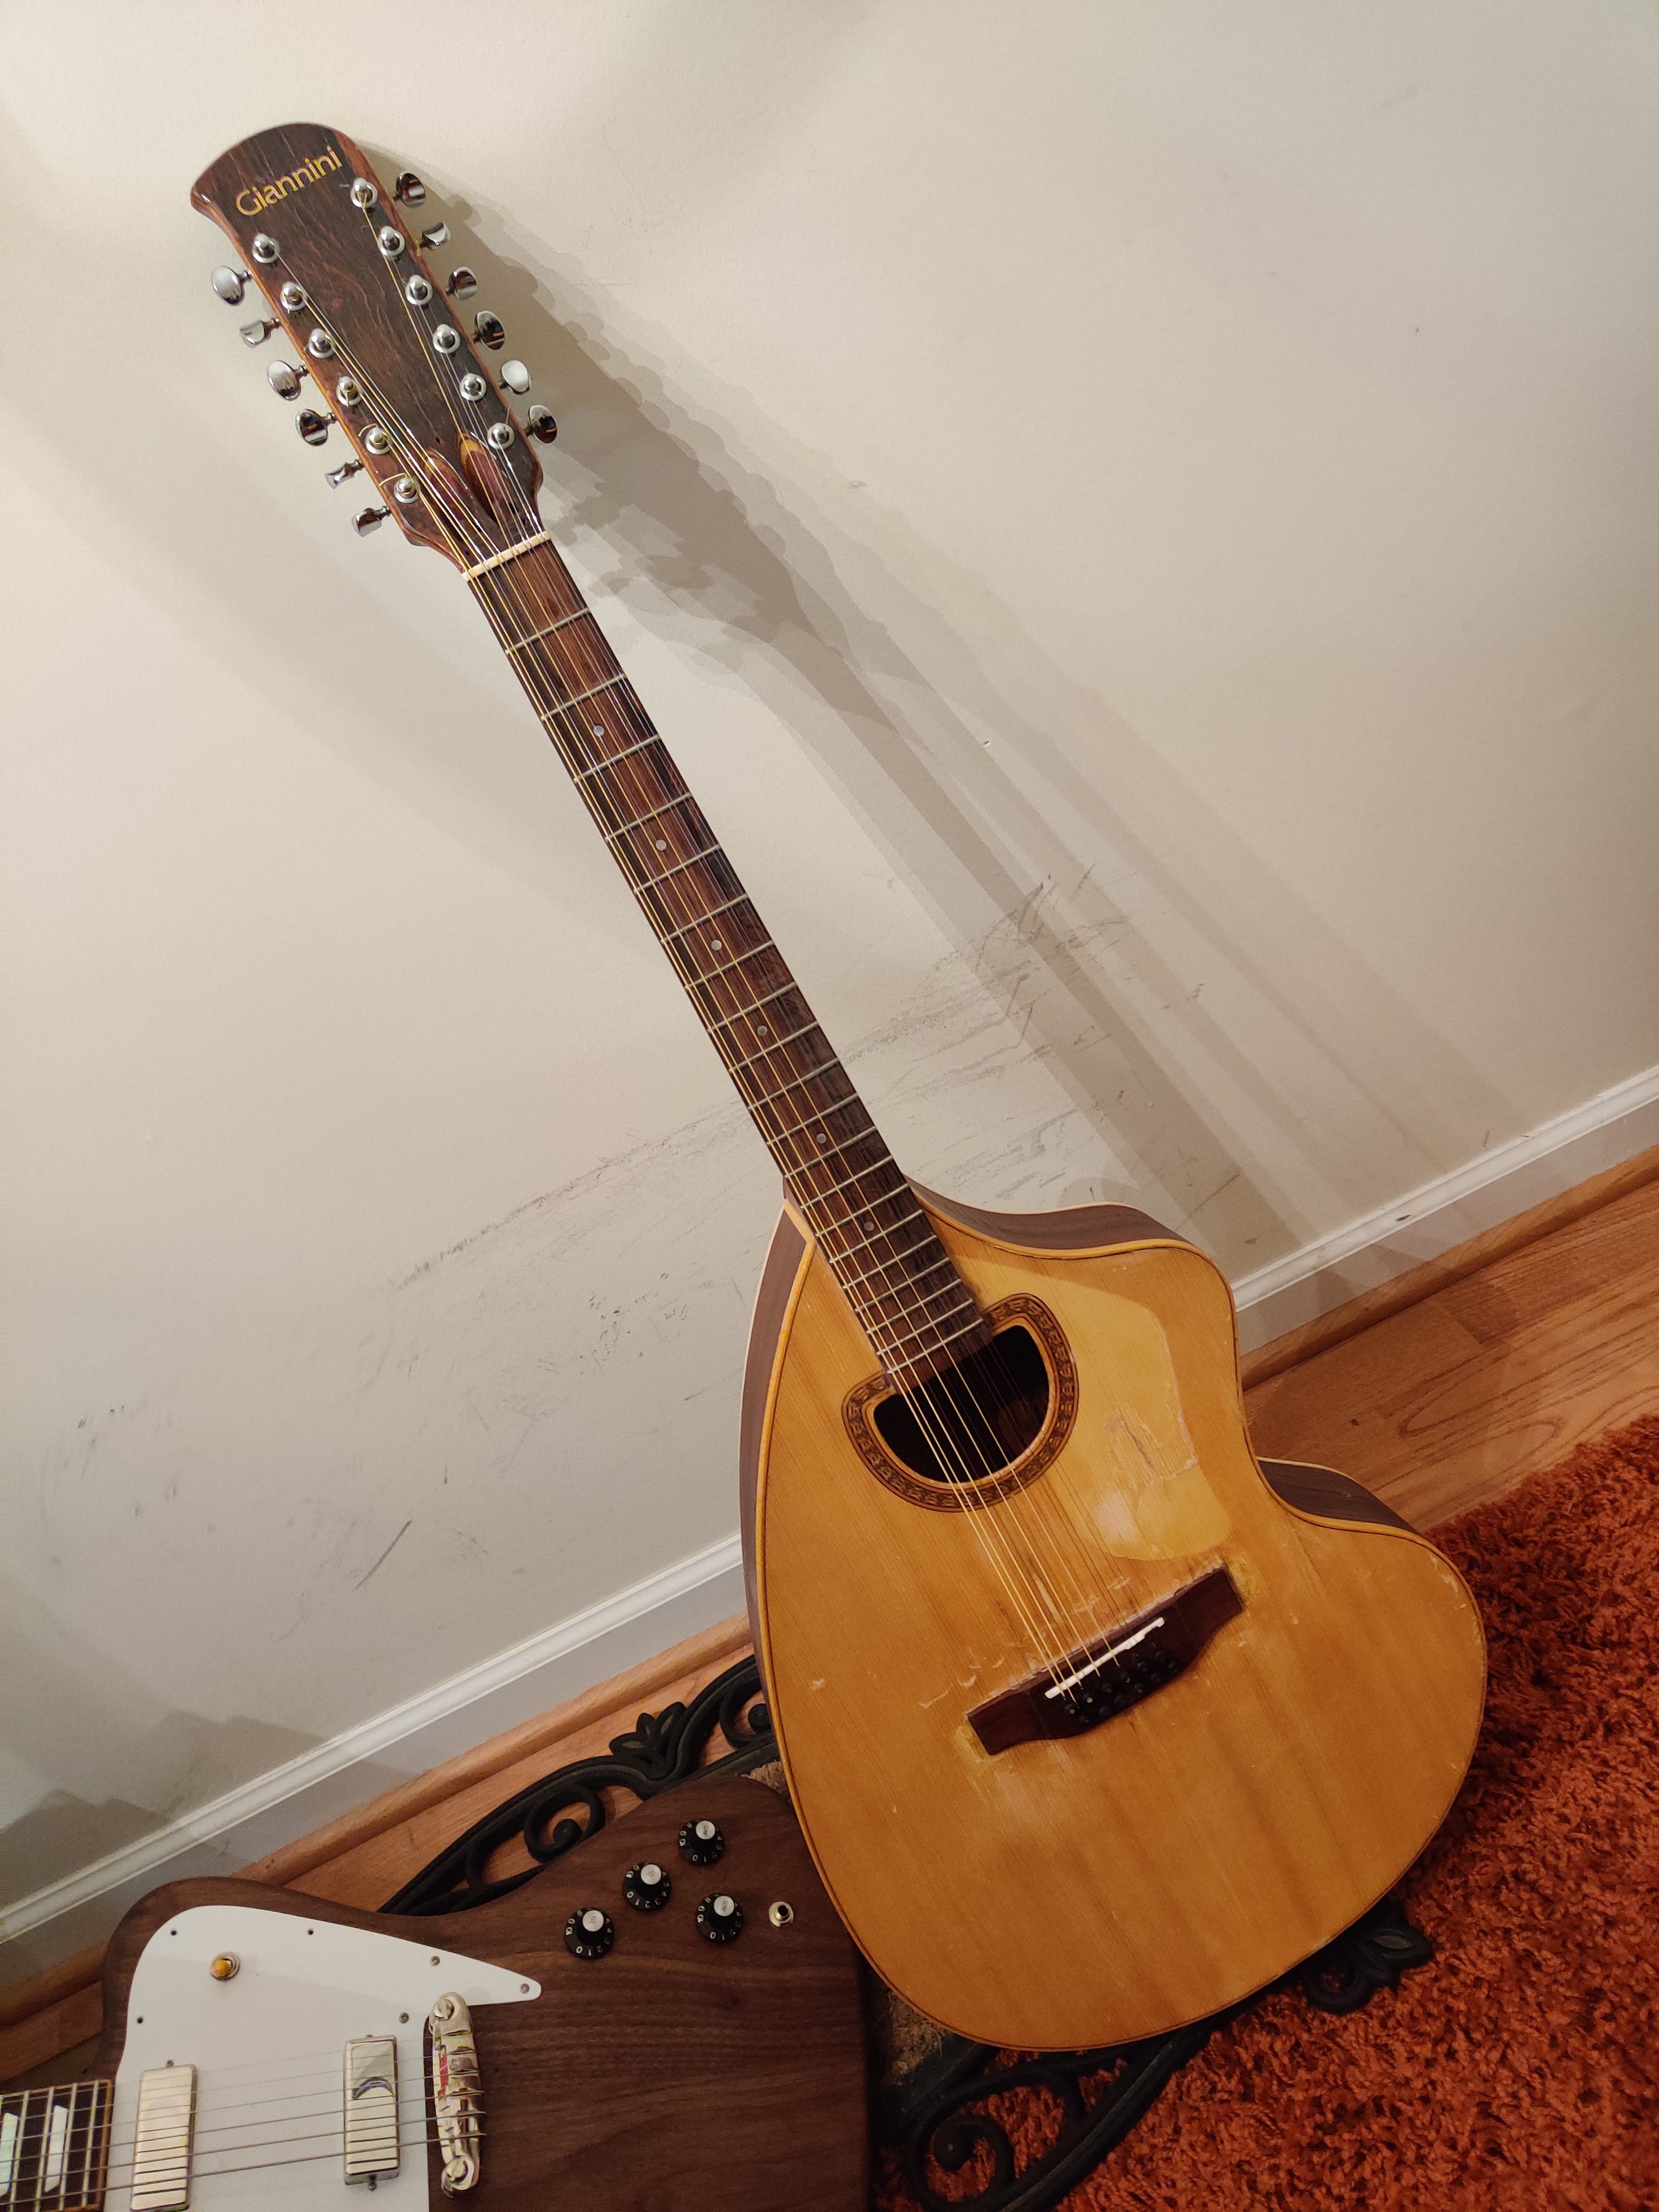
One day on Facebook Marketplace I saw an ad for a Giannini 12 string Craviola that looked like it needed some work:


I’d wanted a 12 string for a while, and this was certainly a unique instrument. I bought it, knowing it would take some time, care, and energy to get it working. I just didn’t realize how much time and energy it would take.
The first thing I do when I buy a used guitar is to take stock of the instrument and give it a good cleaning. I have bought second-hand guitars that looked like they were used as a dog dish. The Craviola wasn’t dirty. It was just in really, really bad shape.
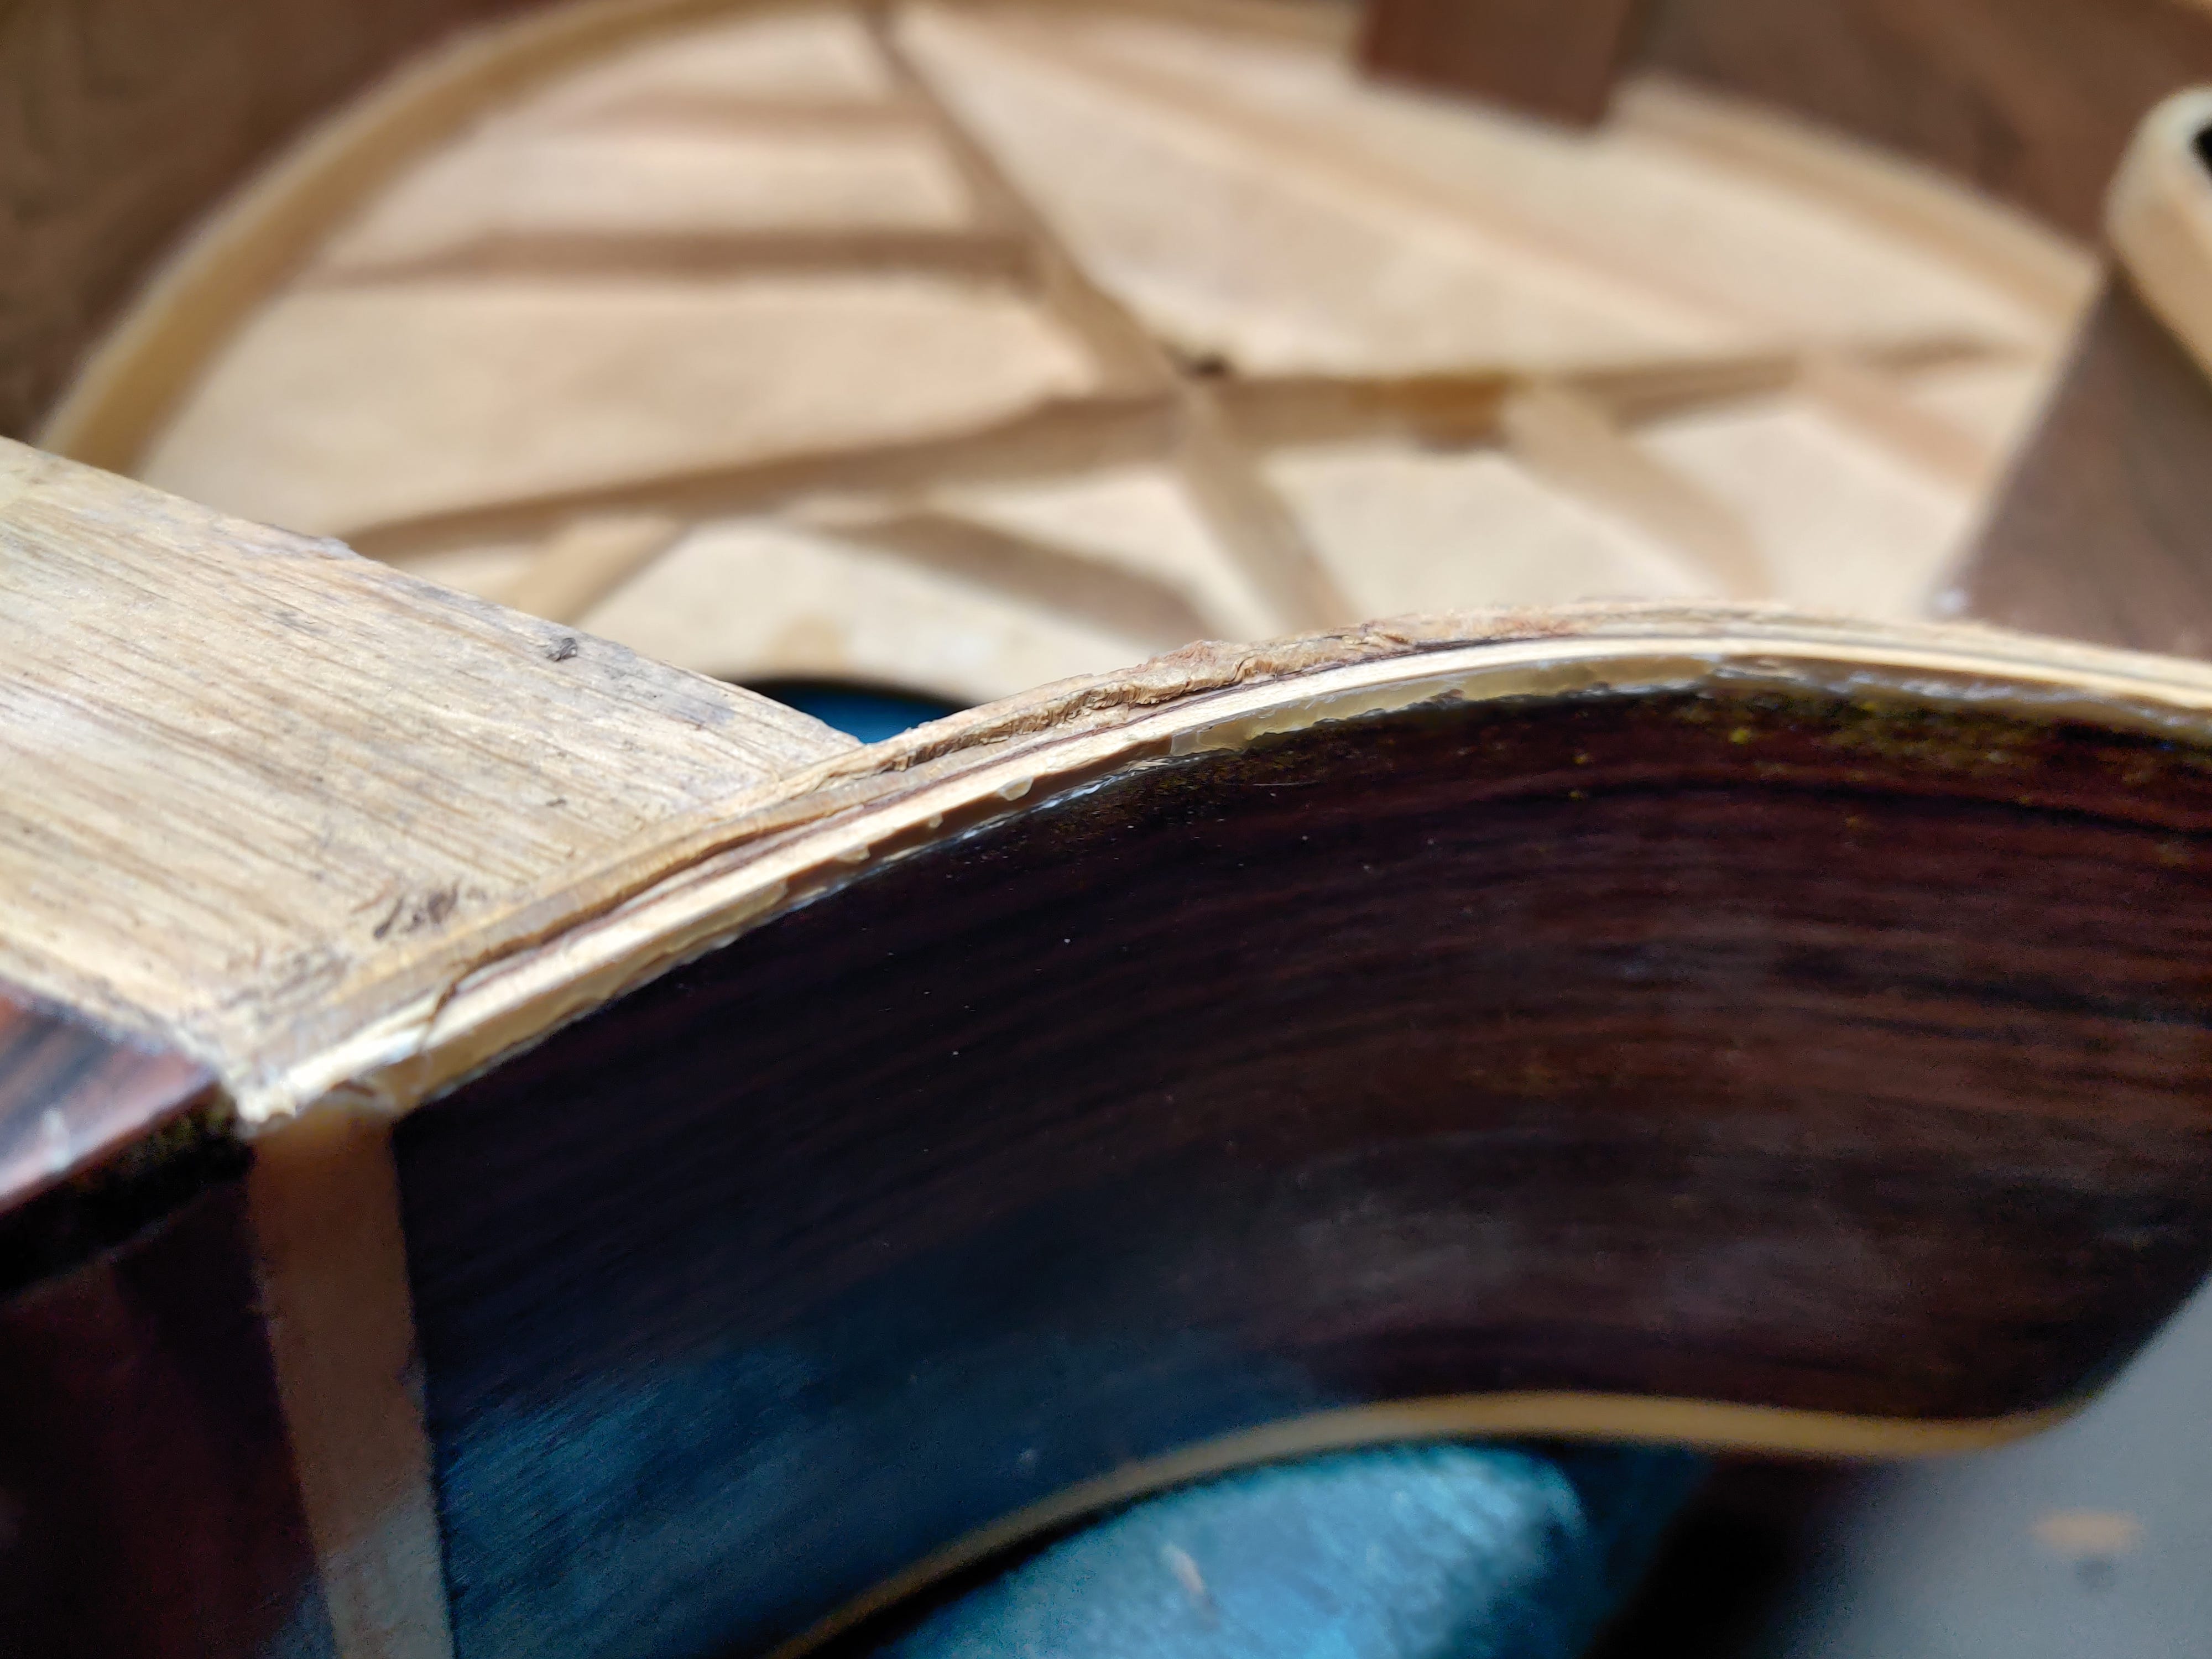
There was a big split where the back joined the top side, where most likely the guitar had either landed when dropped or made unfortunate contact with a solid object:
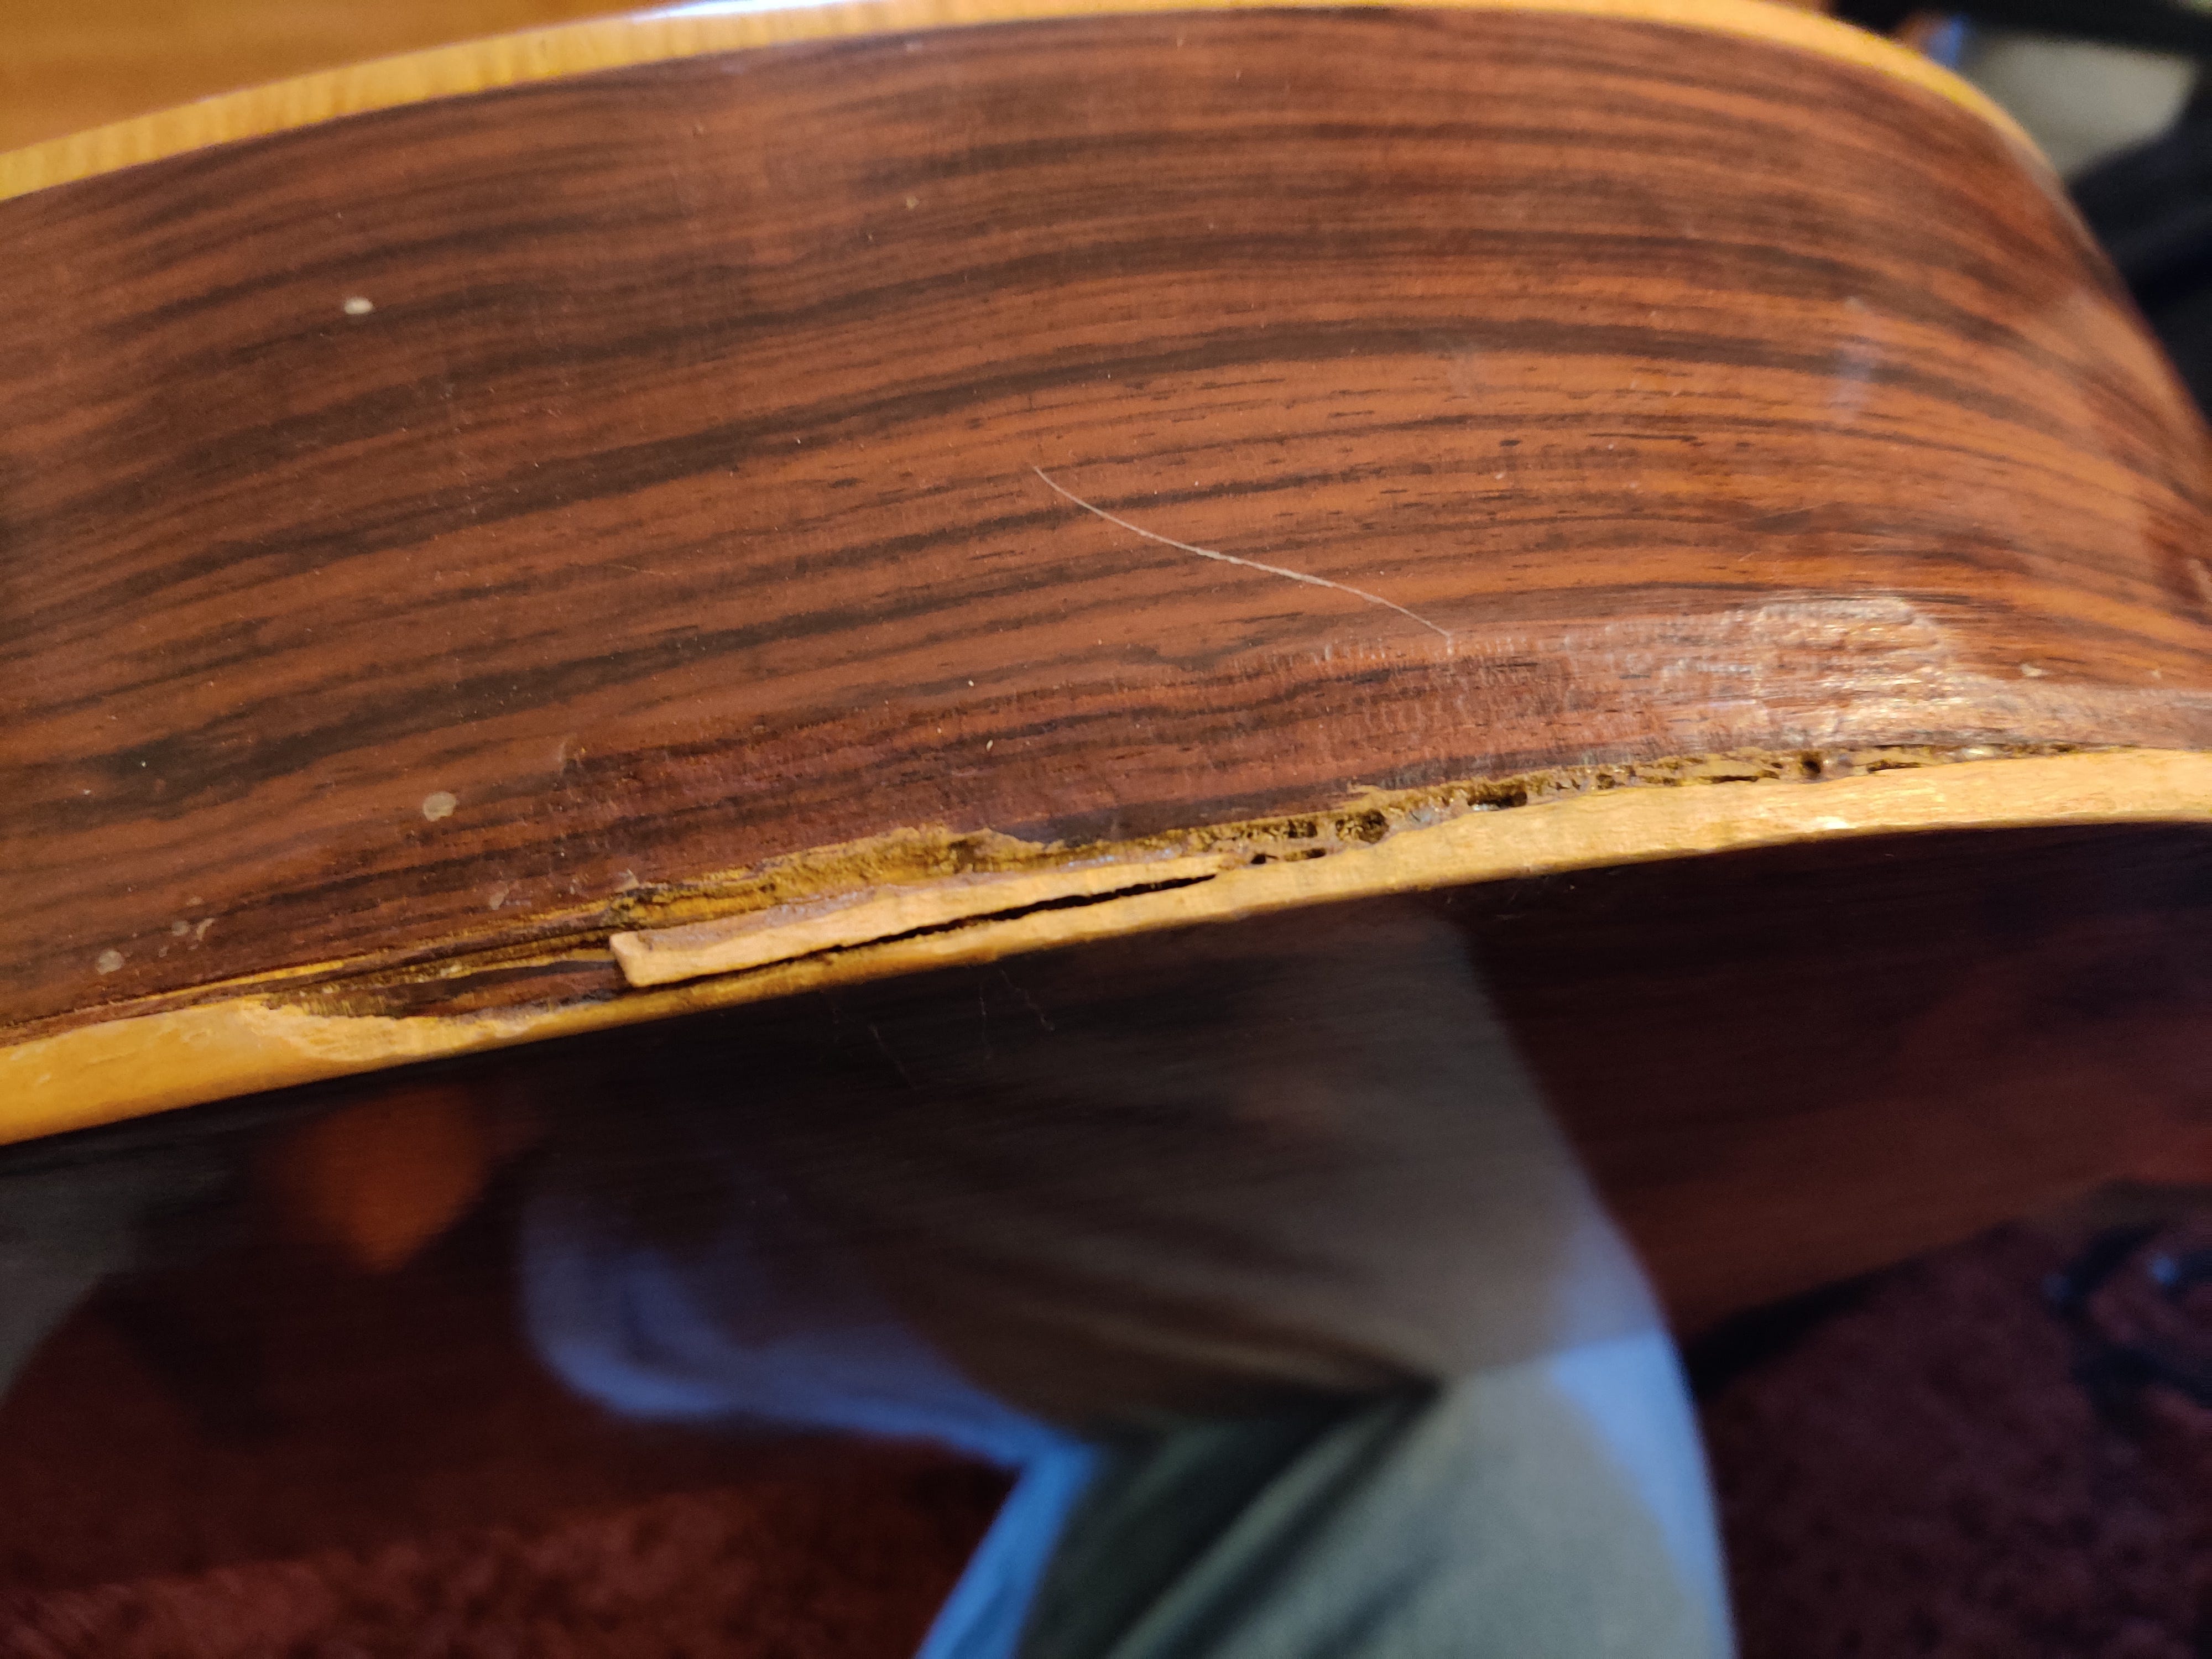
It didn’t help that someone apparently tried to fix it using a beaver with a methamphetamine problem.
There were dings, scratches, and places where the lacquer had lifted away from the wood. Worst of all, a large part of the guitar was covered in dirt and… paint?
If I had to guess, I’d say that the guitar was left somewhere in proximity to a spray booth, or at least was in a room when something was being sprayed. Whatever it was, the adhesion of it was honestly impressive. It was really difficult getting that stuff off.
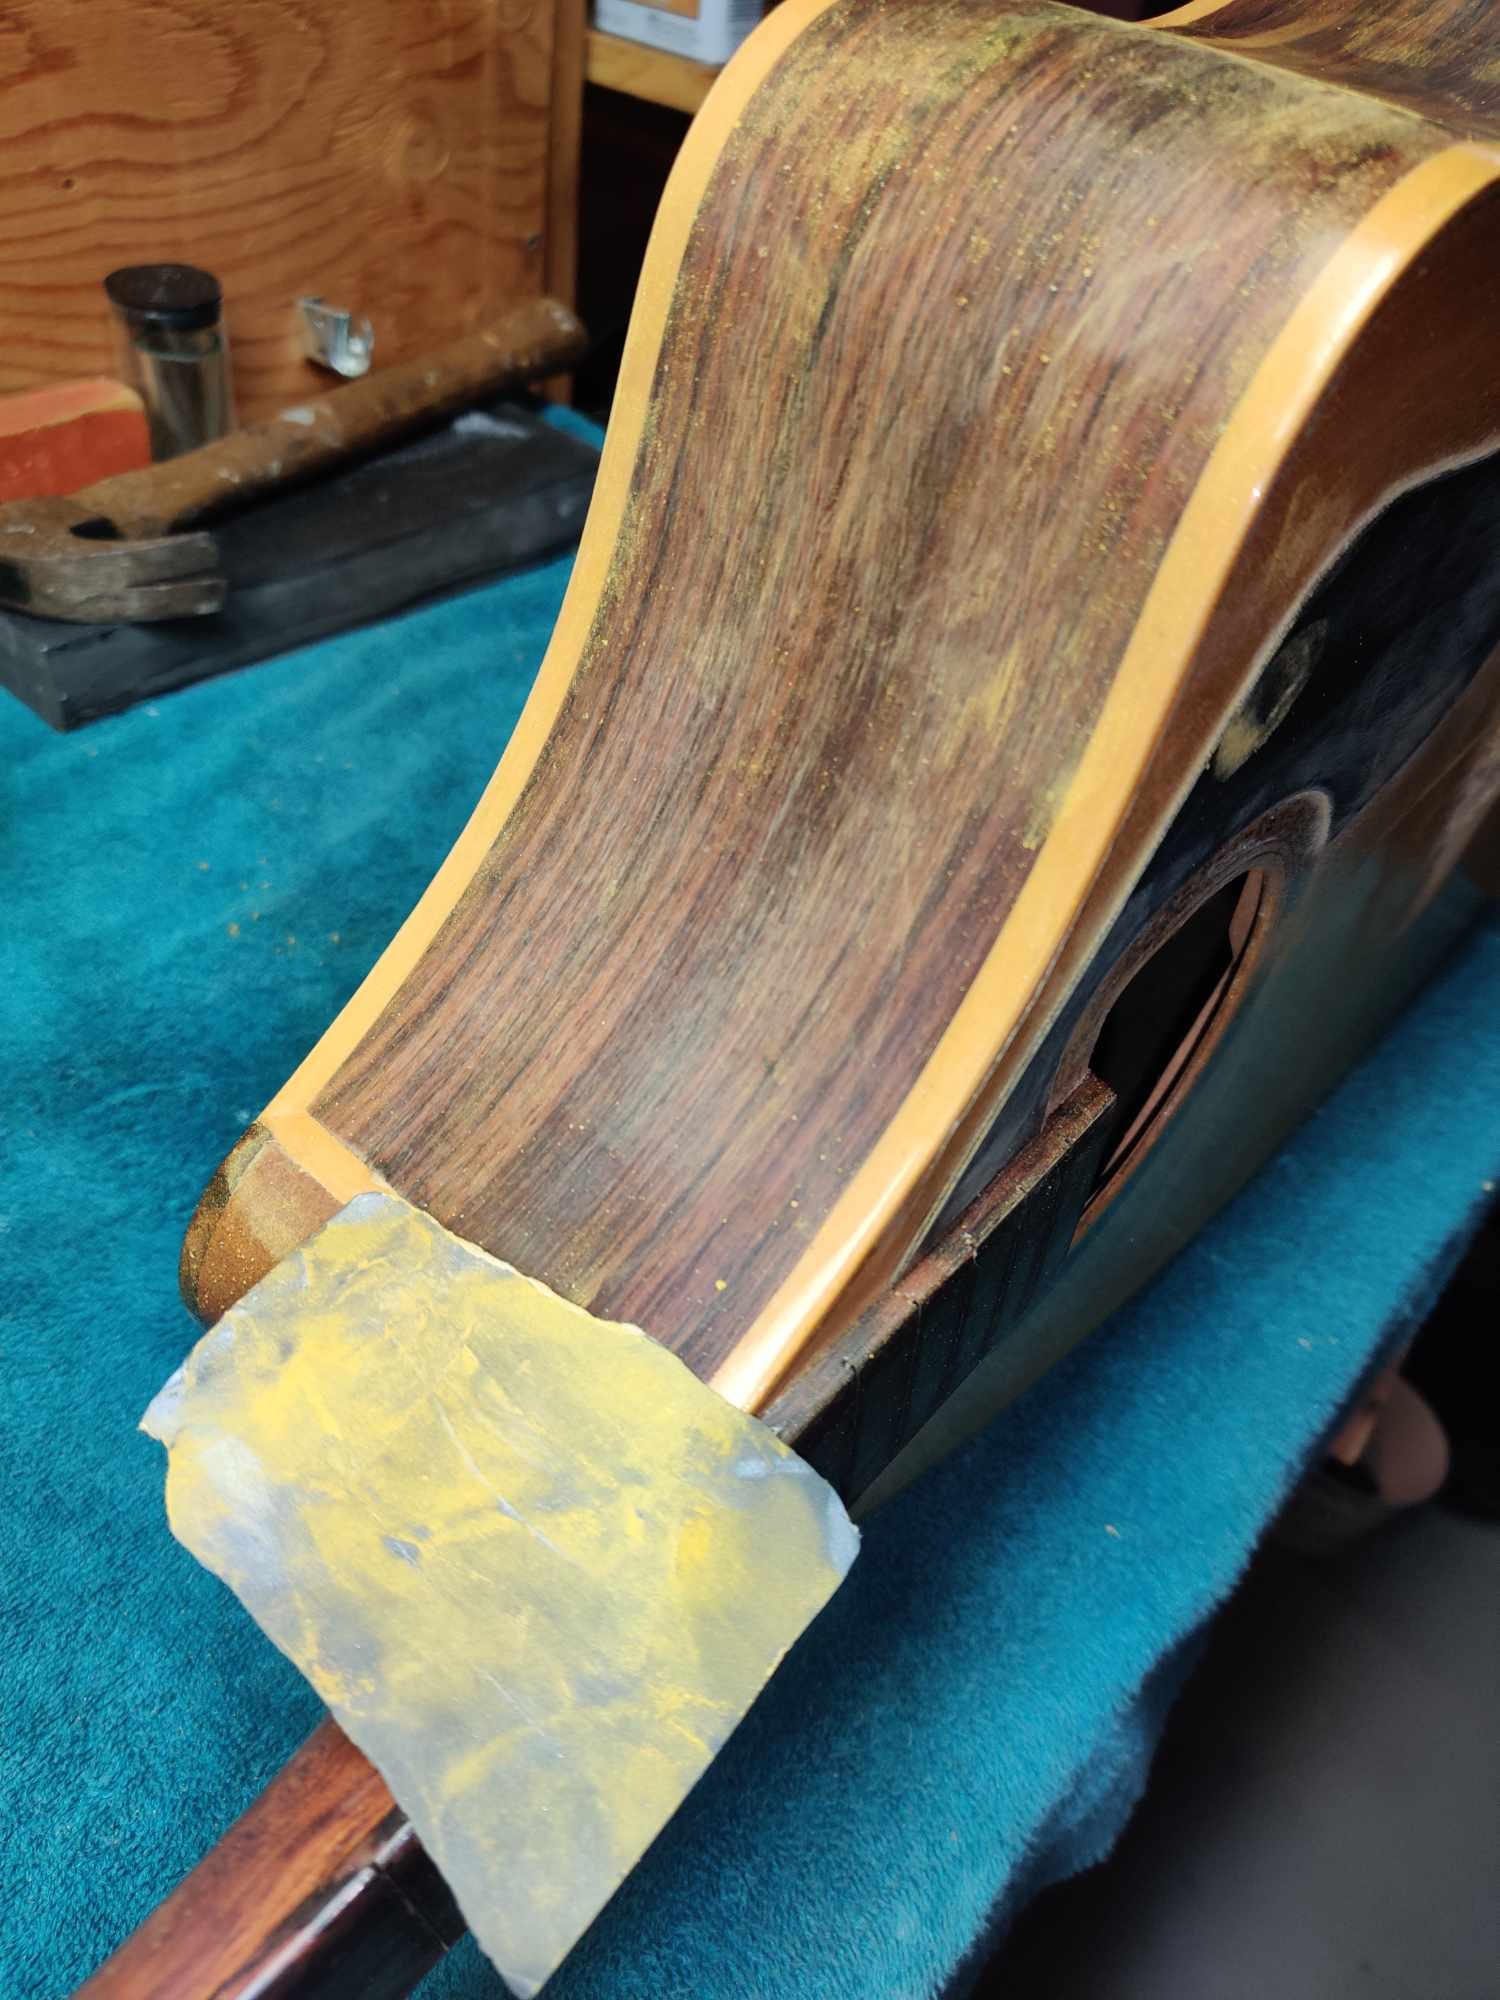
It took a lot of scrubbing with 0000 steel wool, but I eventually began winning. The guitar underneath all that… whatever it was, was actually in pretty good shape.
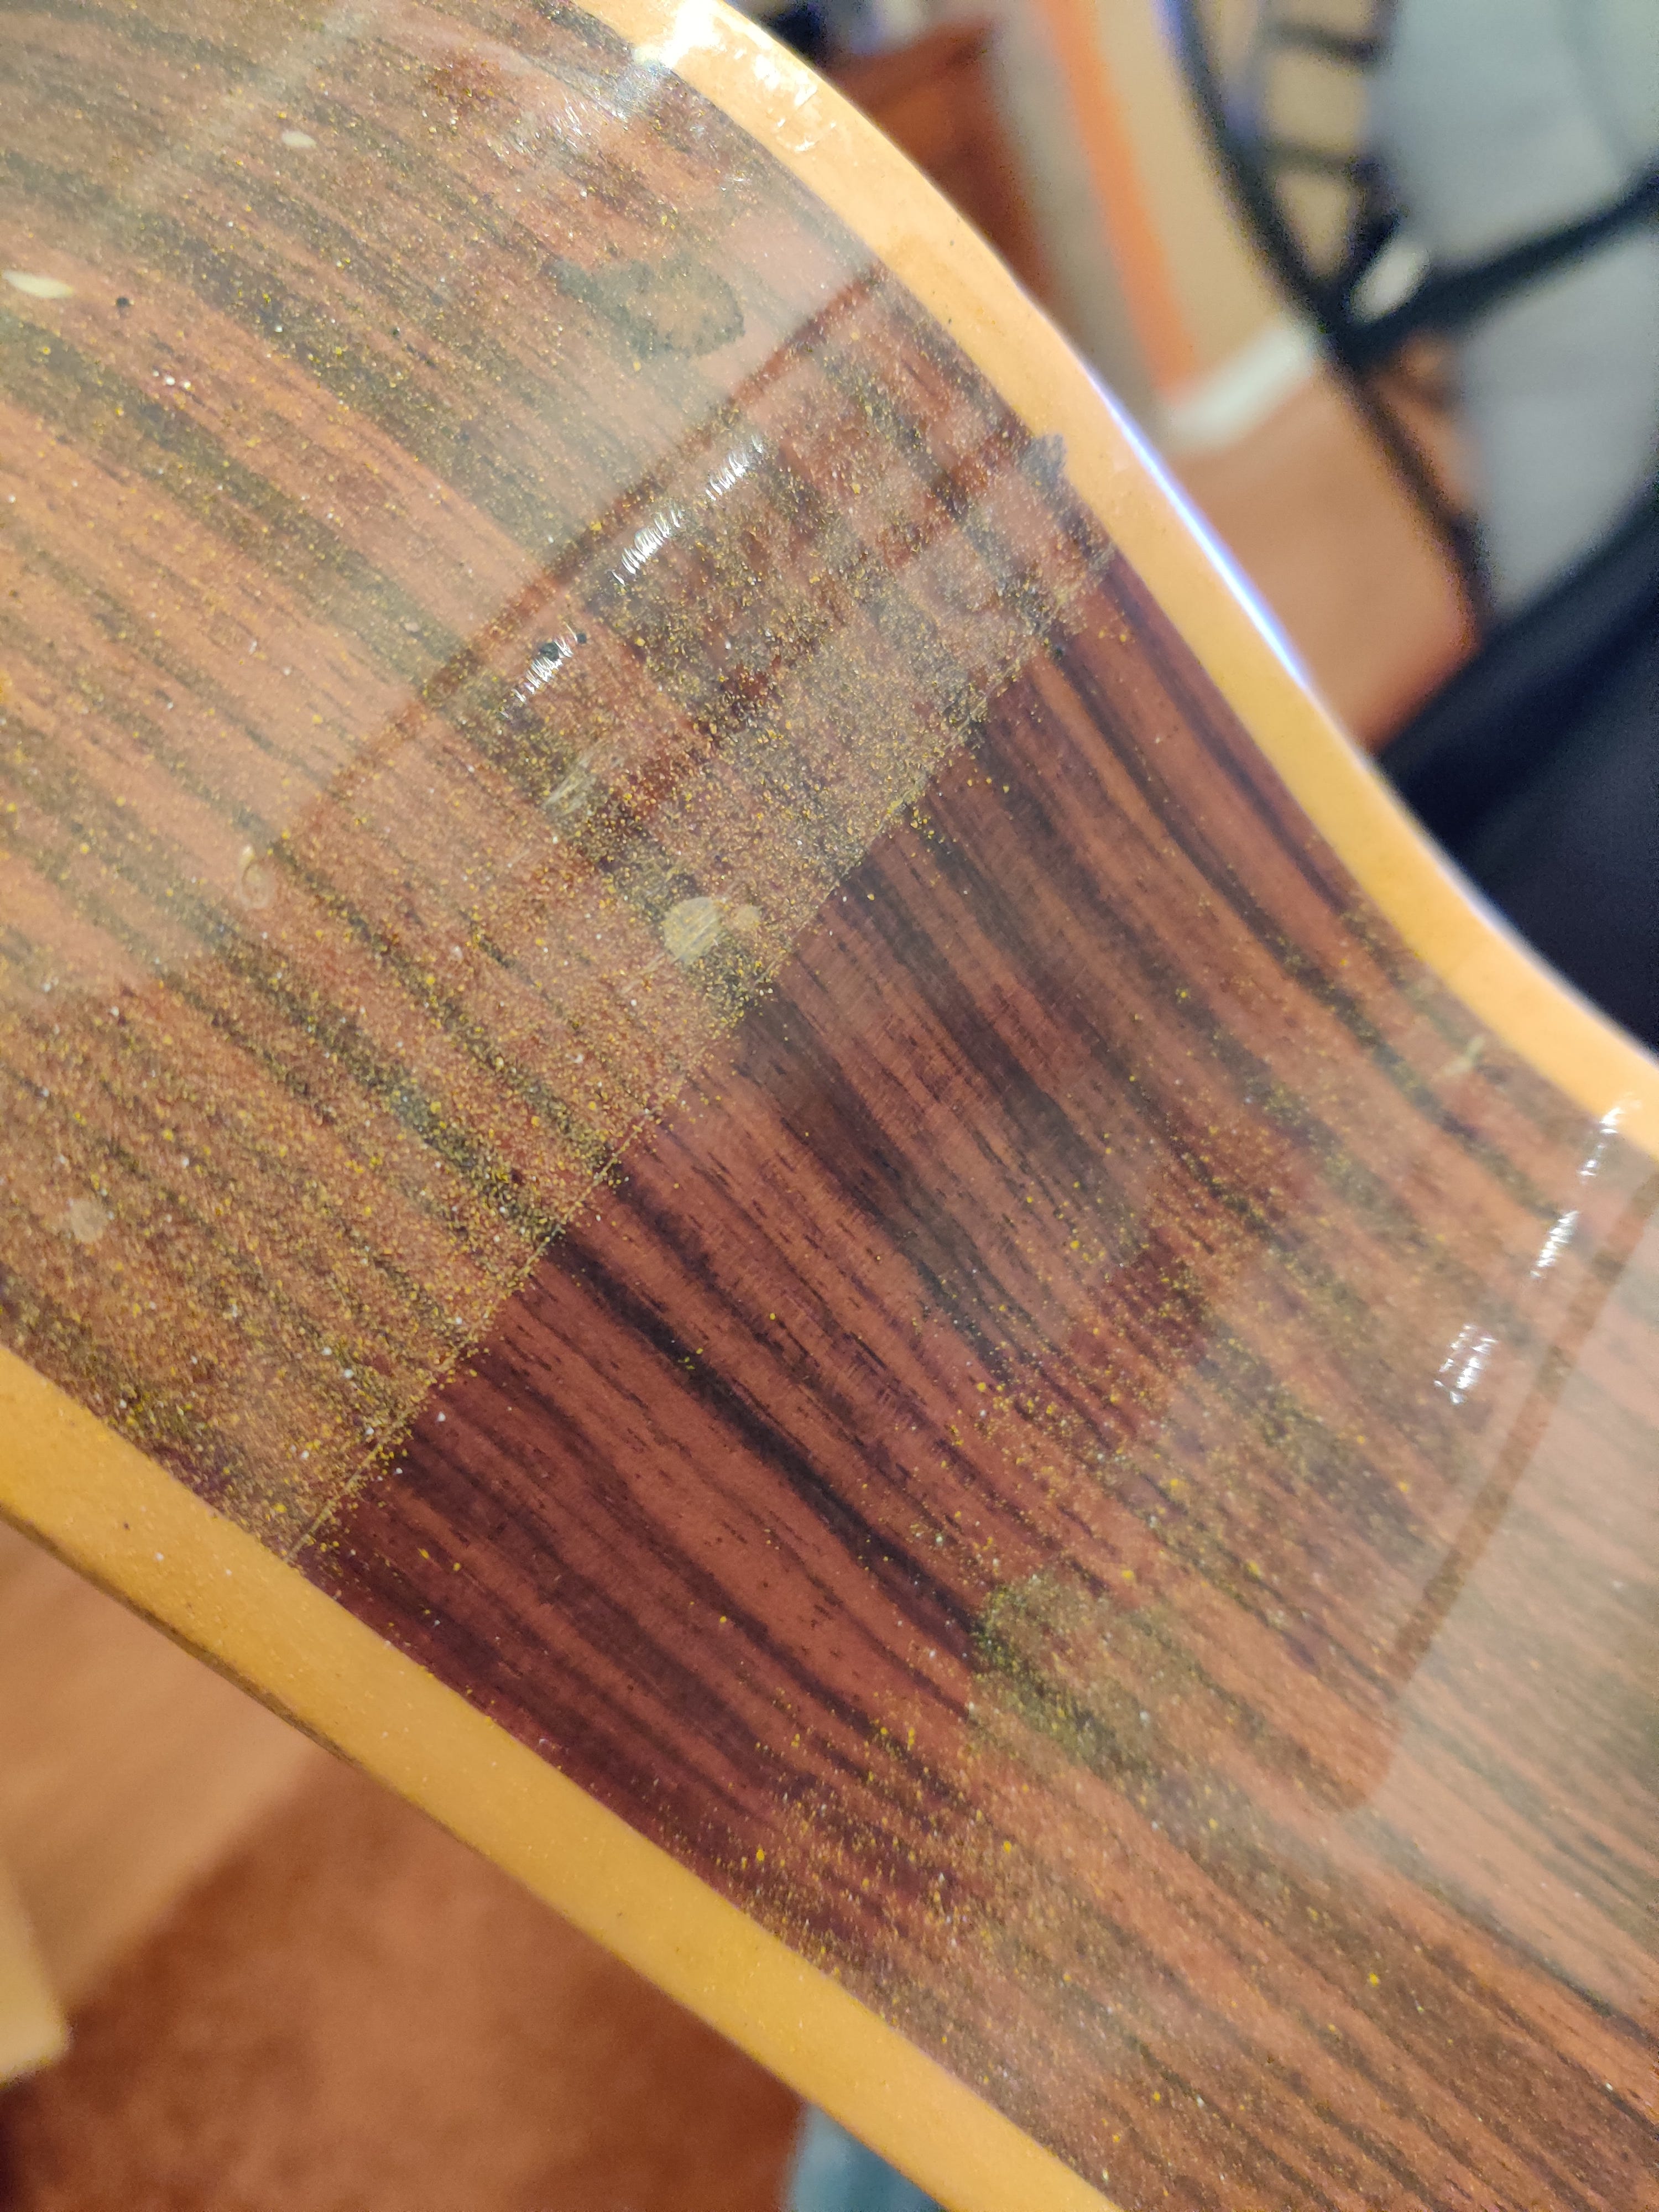
That was a good thing, because it helped motivate me. I cleaned up the sides and back, just to see how they would look. They looked pretty good.


I needed that motivation, because the top, or face of the guitar, was not in good shape.
12 string guitars can produce a lot of tension on a neck, and on an acoustic guitar they can also pull a bridge forward, or, if left long enough, all the way off. This guitar had it bad. Even with two truss rods. The bridge was barely hanging on.


Part of the problem with the bridge was a previous ‘repair’ that was a lot more glue than contact. Usually you have to heat an acoustic bridge to get the glue to release. This one had so little contact that I didn’t even need heat.


With the bridge removed, I could see what the top looked like. It wasn’t good.

That photo doesn’t show it well, but there was a very large bulge in top behind the bridge. This one does:
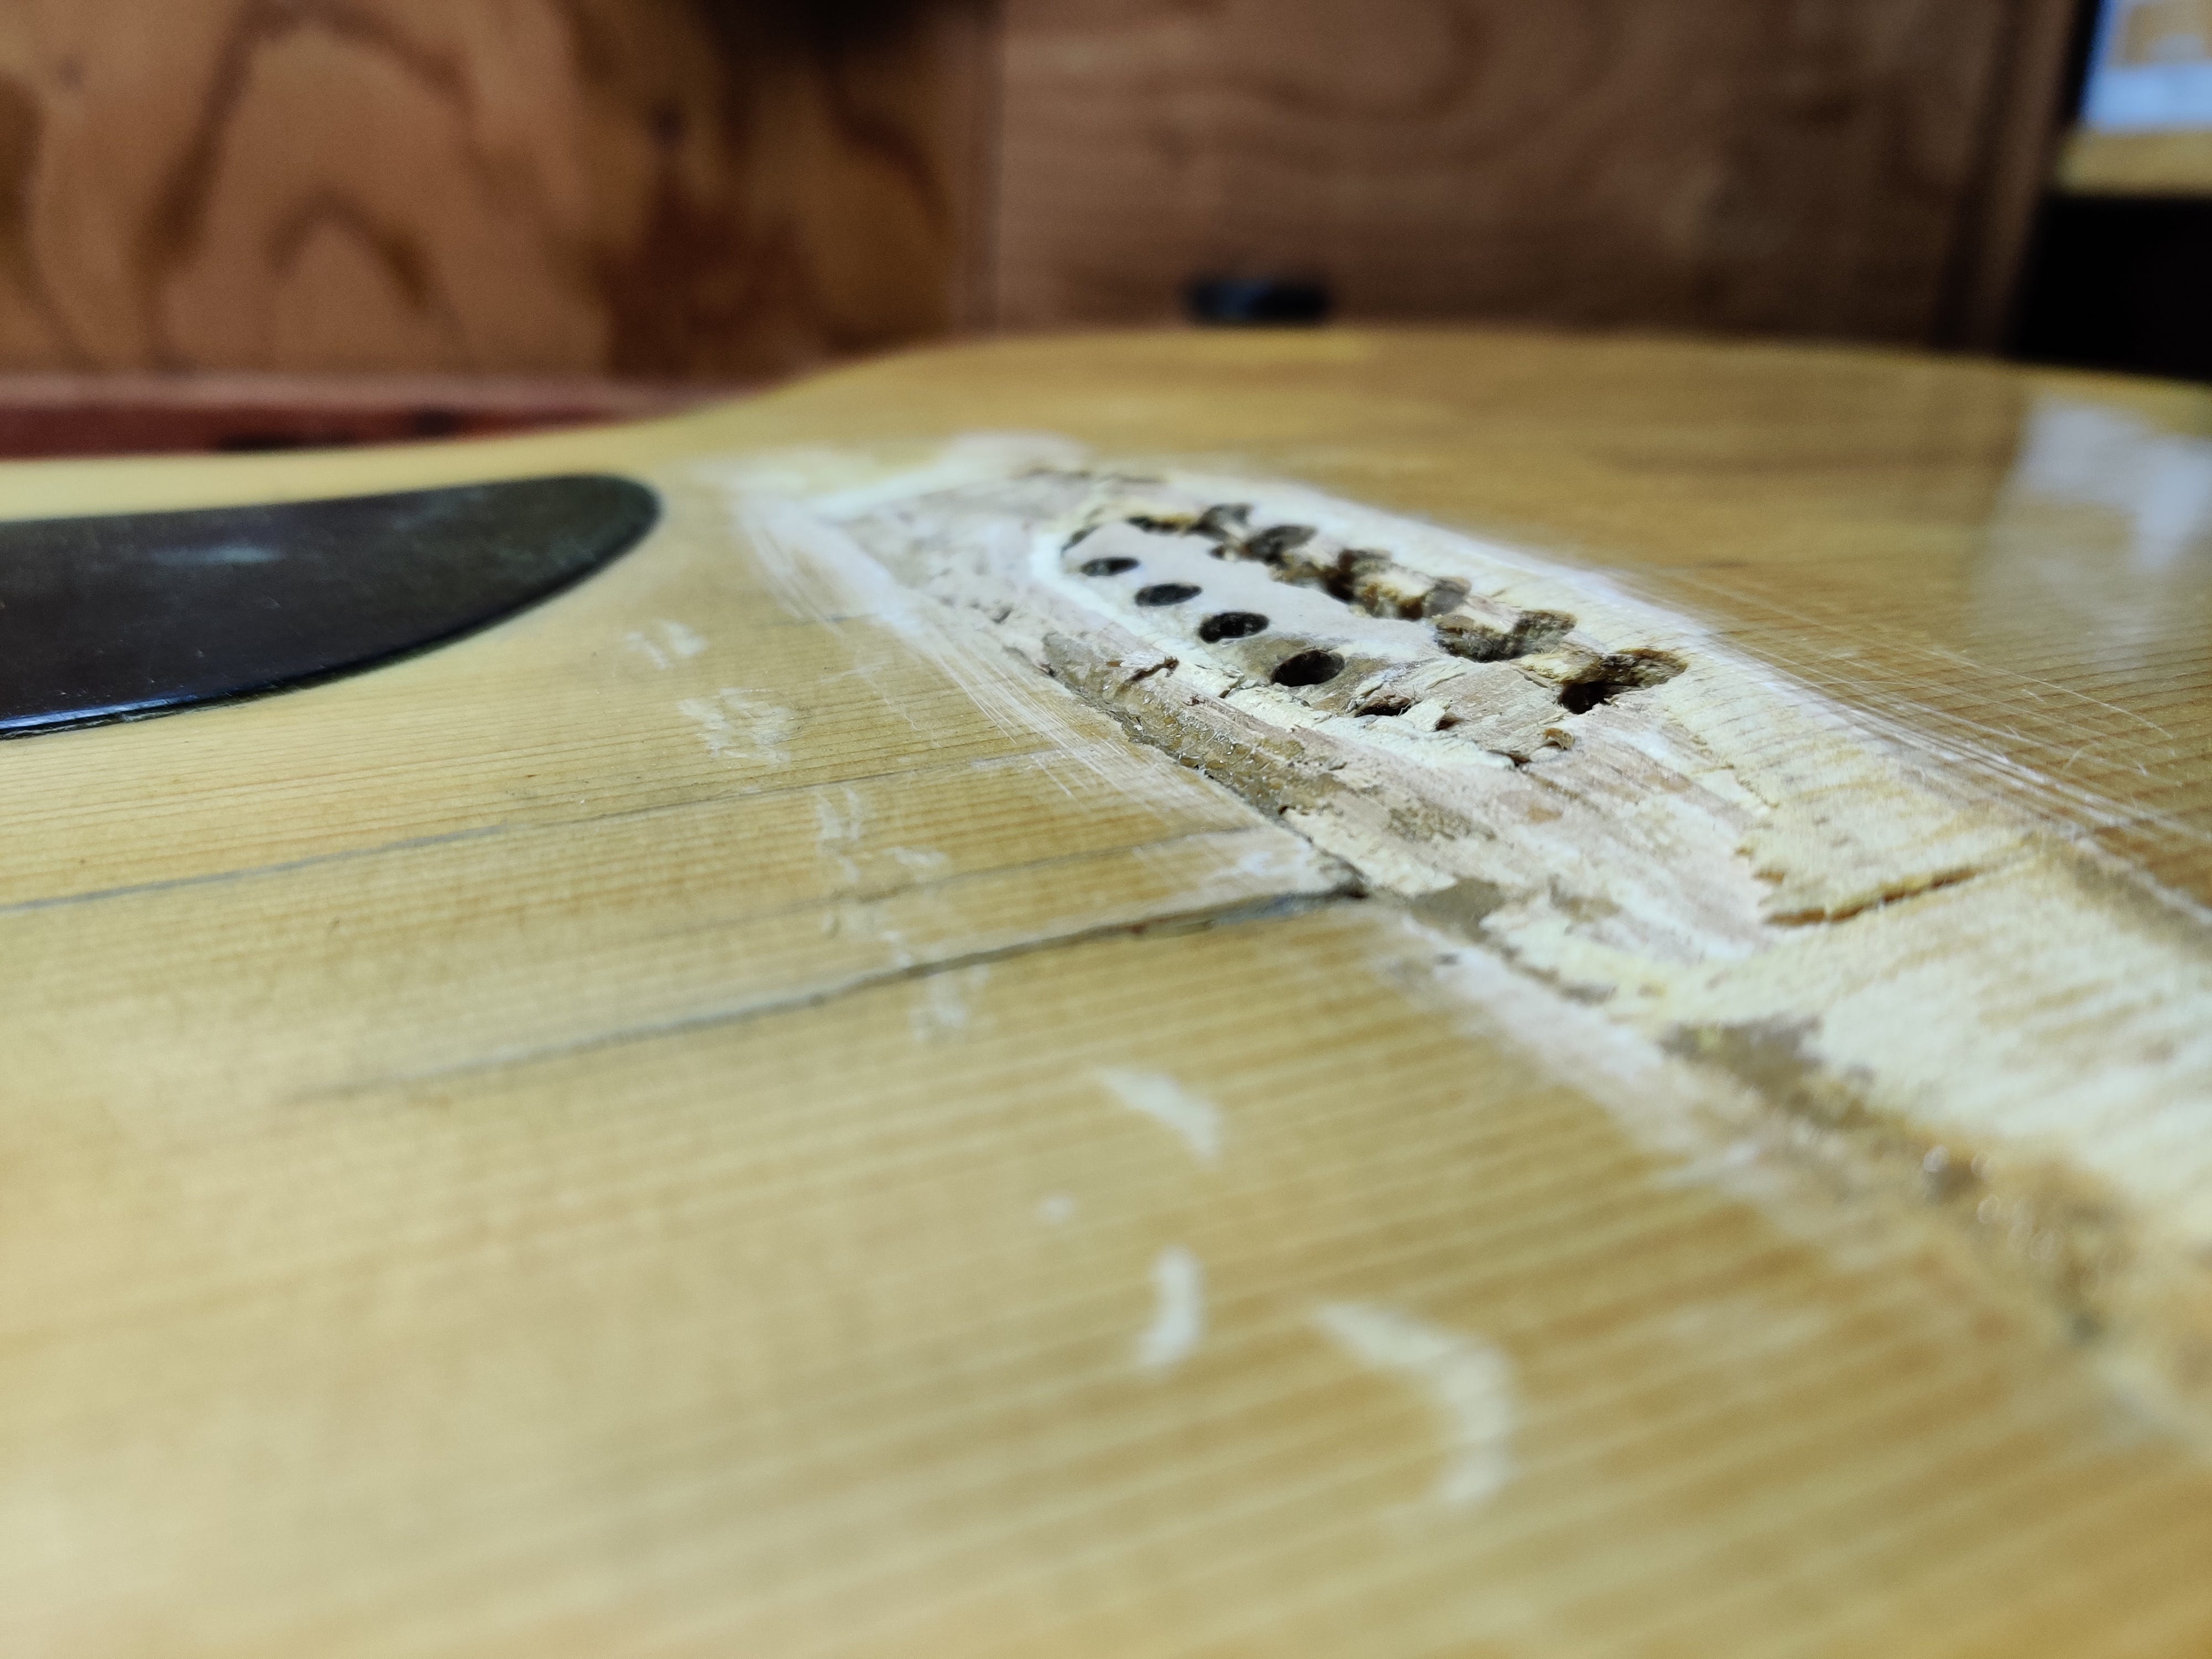
I knew I was going to have to try and flatten the top. I would also have to repair that hole in the top and replace the bridge pad, a piece of wood that sits underneath the bridge and top. An inspection of the inside of the guitar, accomplished with a small camera, showed that the bridge plate looked no better than the top. Or the bridge. This repair project was mushrooming.
Faced with an ever-expanding list of things I would need to do, I decided to remove the frets, because they were practically nonexistent. Pulling old frets can be difficult, but this went quickly, especially because the fret tangs (the part that fits into the slot in the wood) were smooth and not barbed:


The inlays had sunken in quite a bit, so I filled them with super glue. The refretting went pretty easily, which was one of the few times I can say that about this guitar.


Faced with the problems on the guitar’s top, I decided to remove the back in order to gain access to the bridge pad. I removed the back by cutting through the binding on the back with a Dremel wheel.
I should have watched literally one more video, because the same evening I removed the back, I watched a video showing me that I had done it wrong and made a lot more work for myself. But at least I could finally see what was going on with the underside of the guitar’s top. It wasn’t pretty.
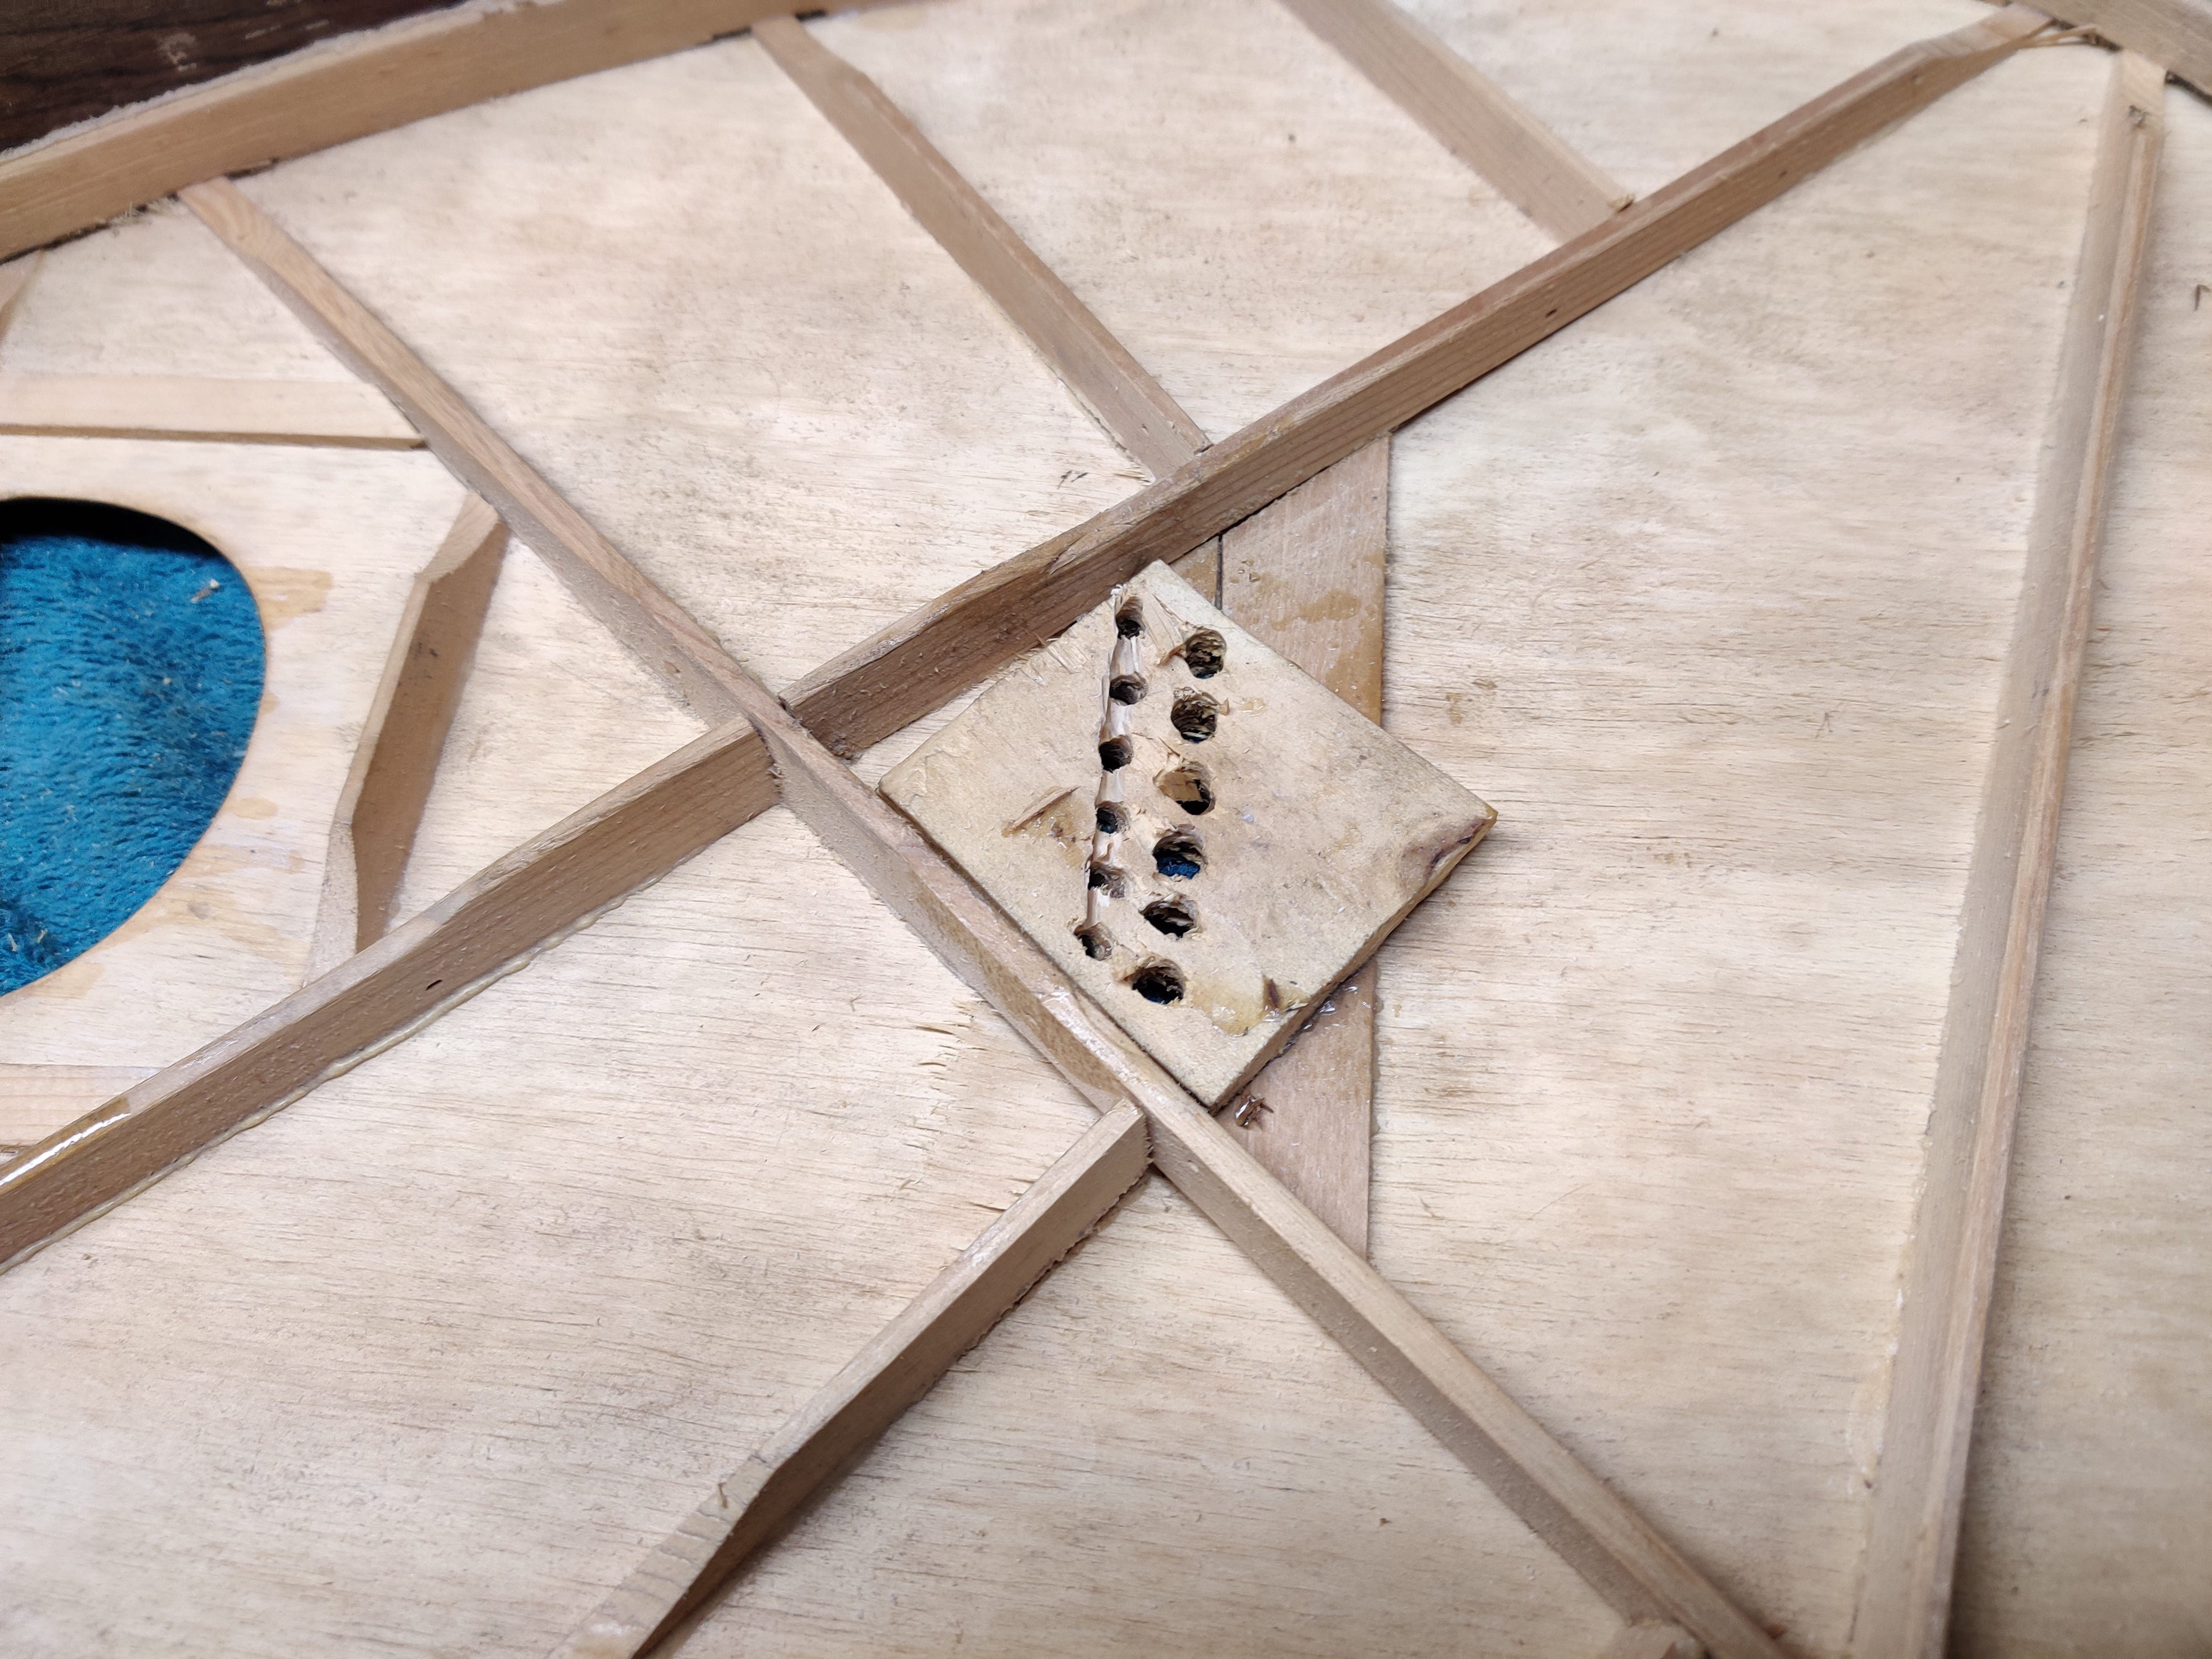
Someone had tried to ‘repair’ the bridge pad by adding a piece of plywood to it. But they glued it in wrong. You can also see that the braces had separated from the top. I set about removing the ‘repair’ and the old bridge pad, heating a scraper on an iron and slowly working my way through the glue. Eventually, I got it all off. Yes, I also used a chisel and a flush-cut saw.


This was, at least, the end of the beginning. From this point, everything I did would be moving towards restoration. I had gotten rid of all the things I needed to remove. Now I could start installing the right things.
I decided to make a larger bridge pad to replace the old one, mostly because I figured it needed it. The pad’s job is to give the ball end of the string something to sit against. The tricky part of this sort of repair is the juggling act during glue-up. It’s always smart to do a dry run, figuring out what to do with the clamps and everything else, because I had to glue on the new pad as well as re-glue the braces, all in one shot. Everything had to be tight against everything else.
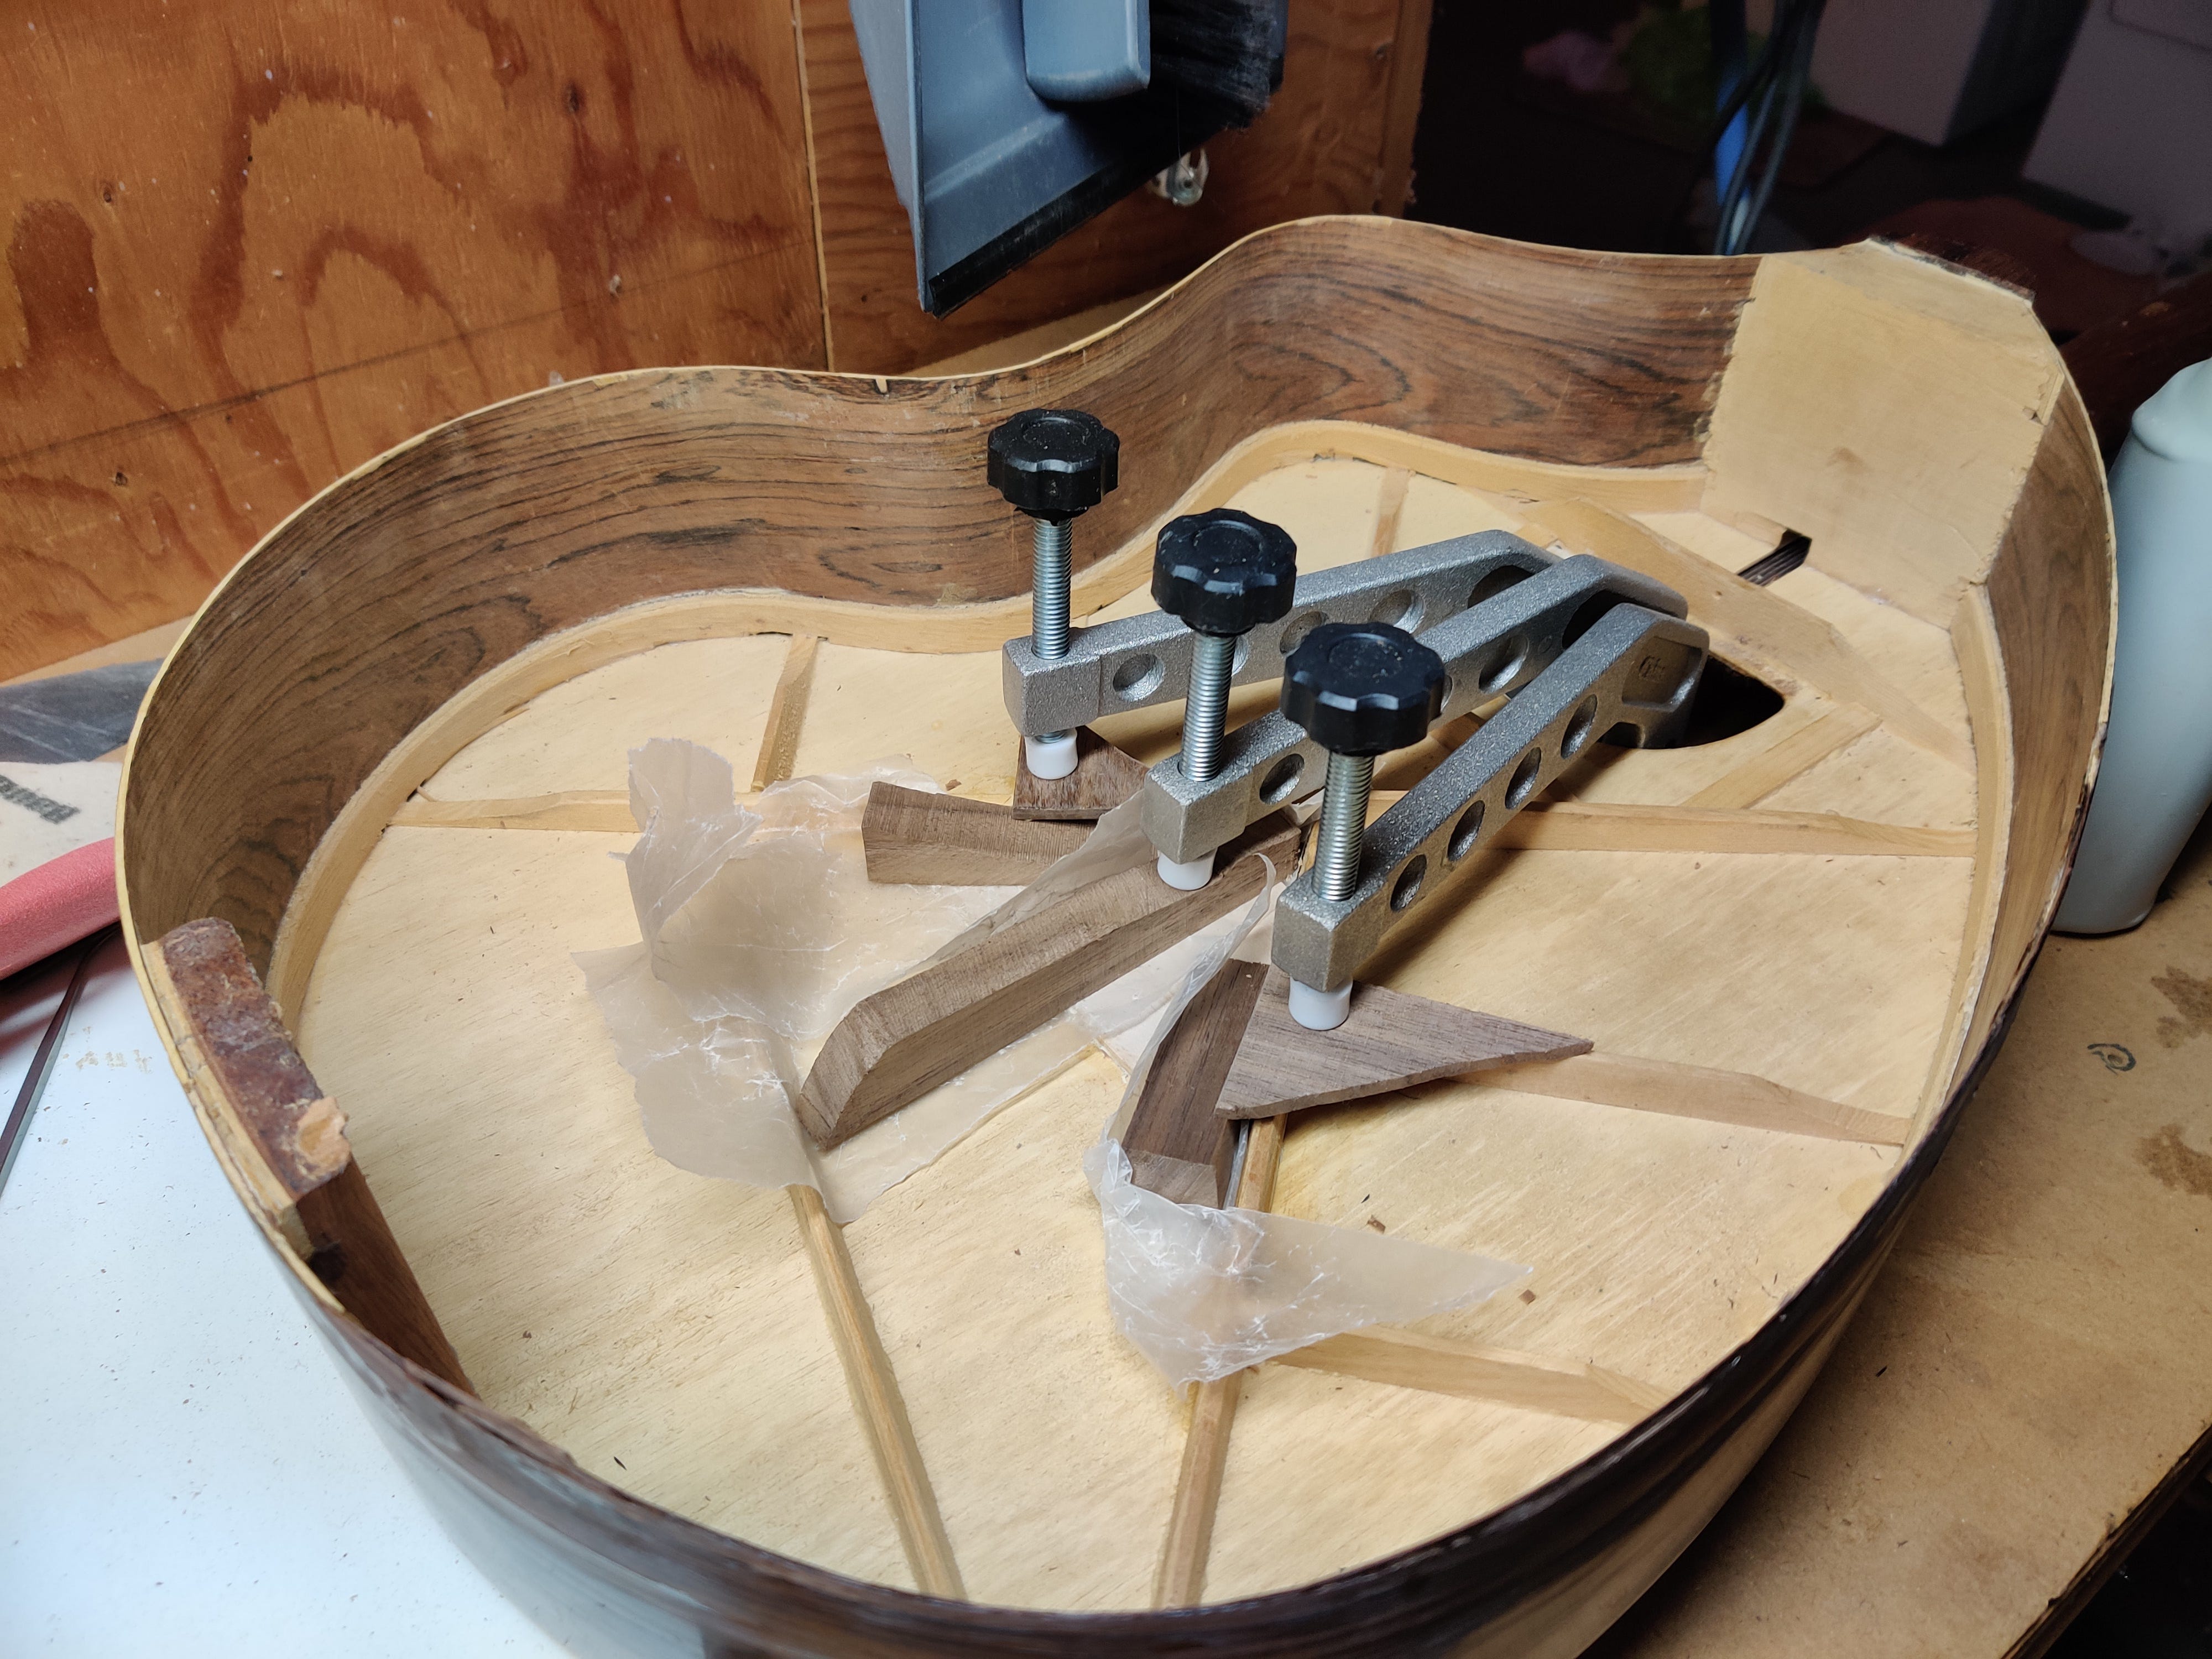
I used a melamine shelf for a flat surface against the top. I had removed the pickguard at this point to make sure I was getting the flattest possible surface. Using three clamps and some wedges, I got the bridge pad in place and the braces held down. It took the vast majority of the bulge out of the top.


The next step was to cut a patch for the hole in the top. I could have done a much better job, but I didn’t have a lot of time to spend on this project. If I ever do another one of these I will do a better job. The patch isn’t perfect, but it fit snugly and was still better than the hole.


Once it was dry, I sanded it flush with the top. That’s a very relative statement, in that the top could not really be called flat in the classical sense. Still, I did my best. I also reminded myself frequently that it’s a pretty low bar with this guitar.
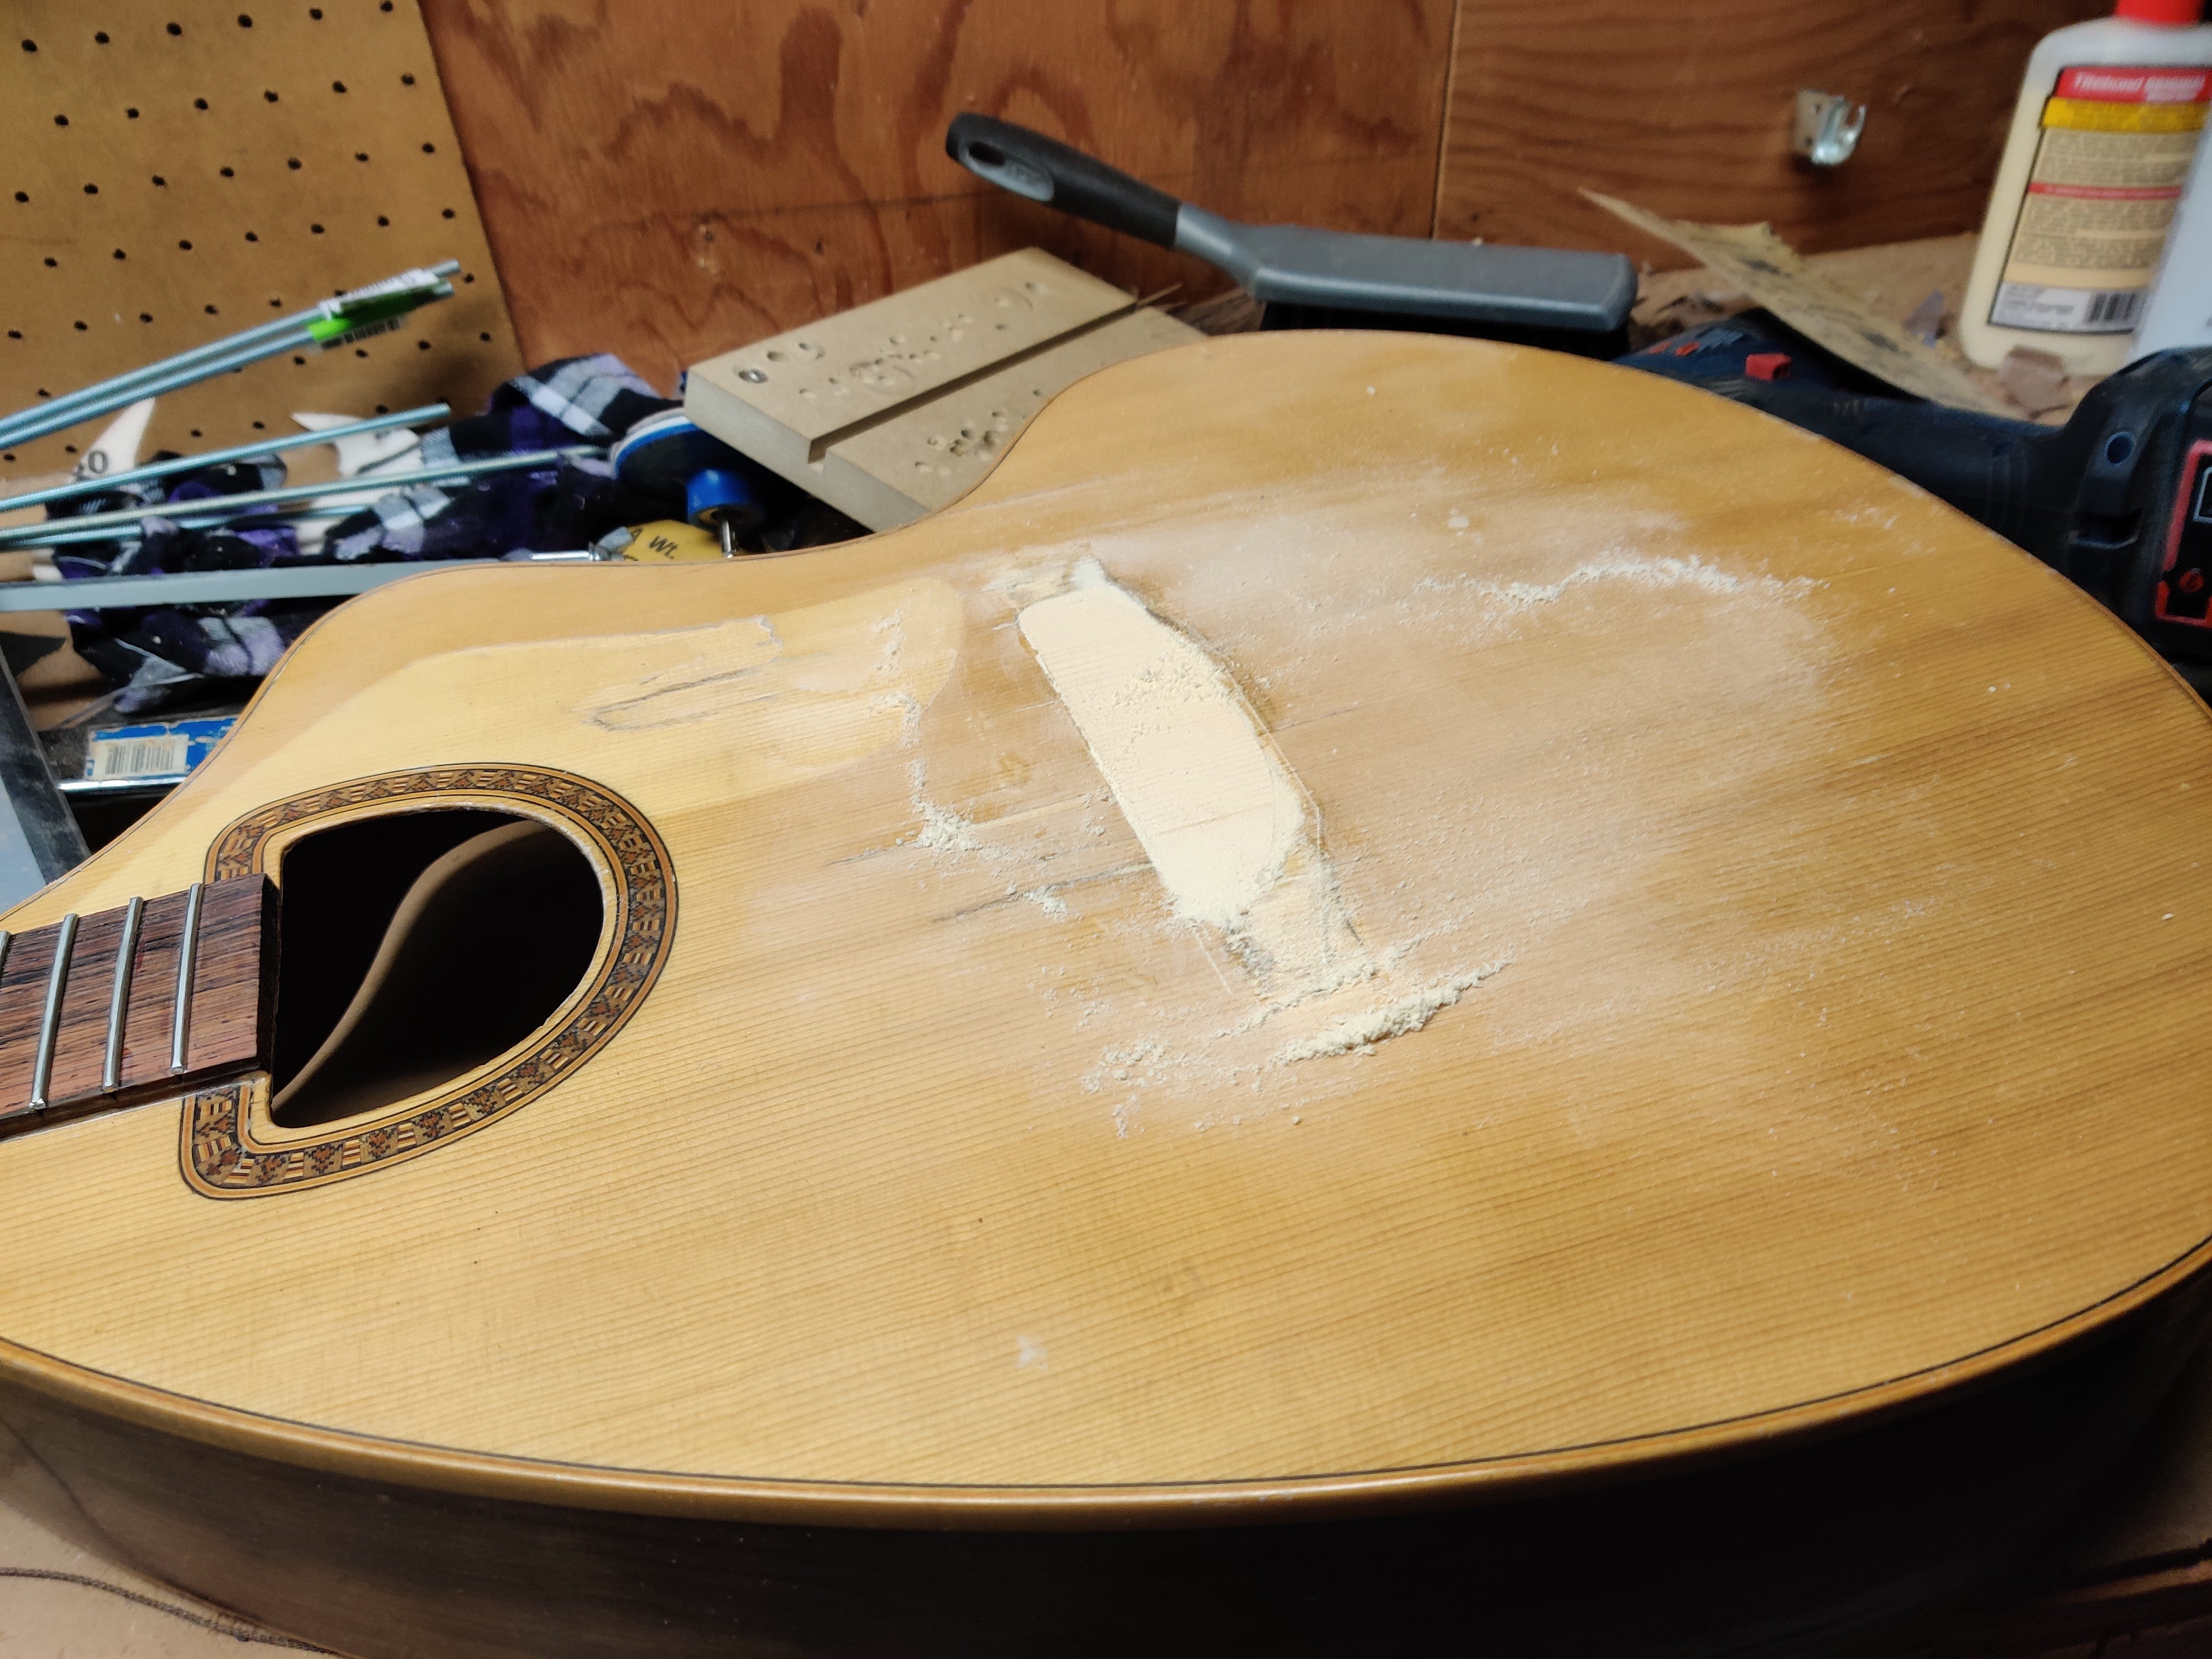
I made sure to put glue in the gaps and rub in as much spruce sawdust as I could. Once that was dry, I could start installing the new bridge. It didn’t match the old one, but it was made specifically to replace old bridges, and was 1mm wider and longer than standard. I needed it.
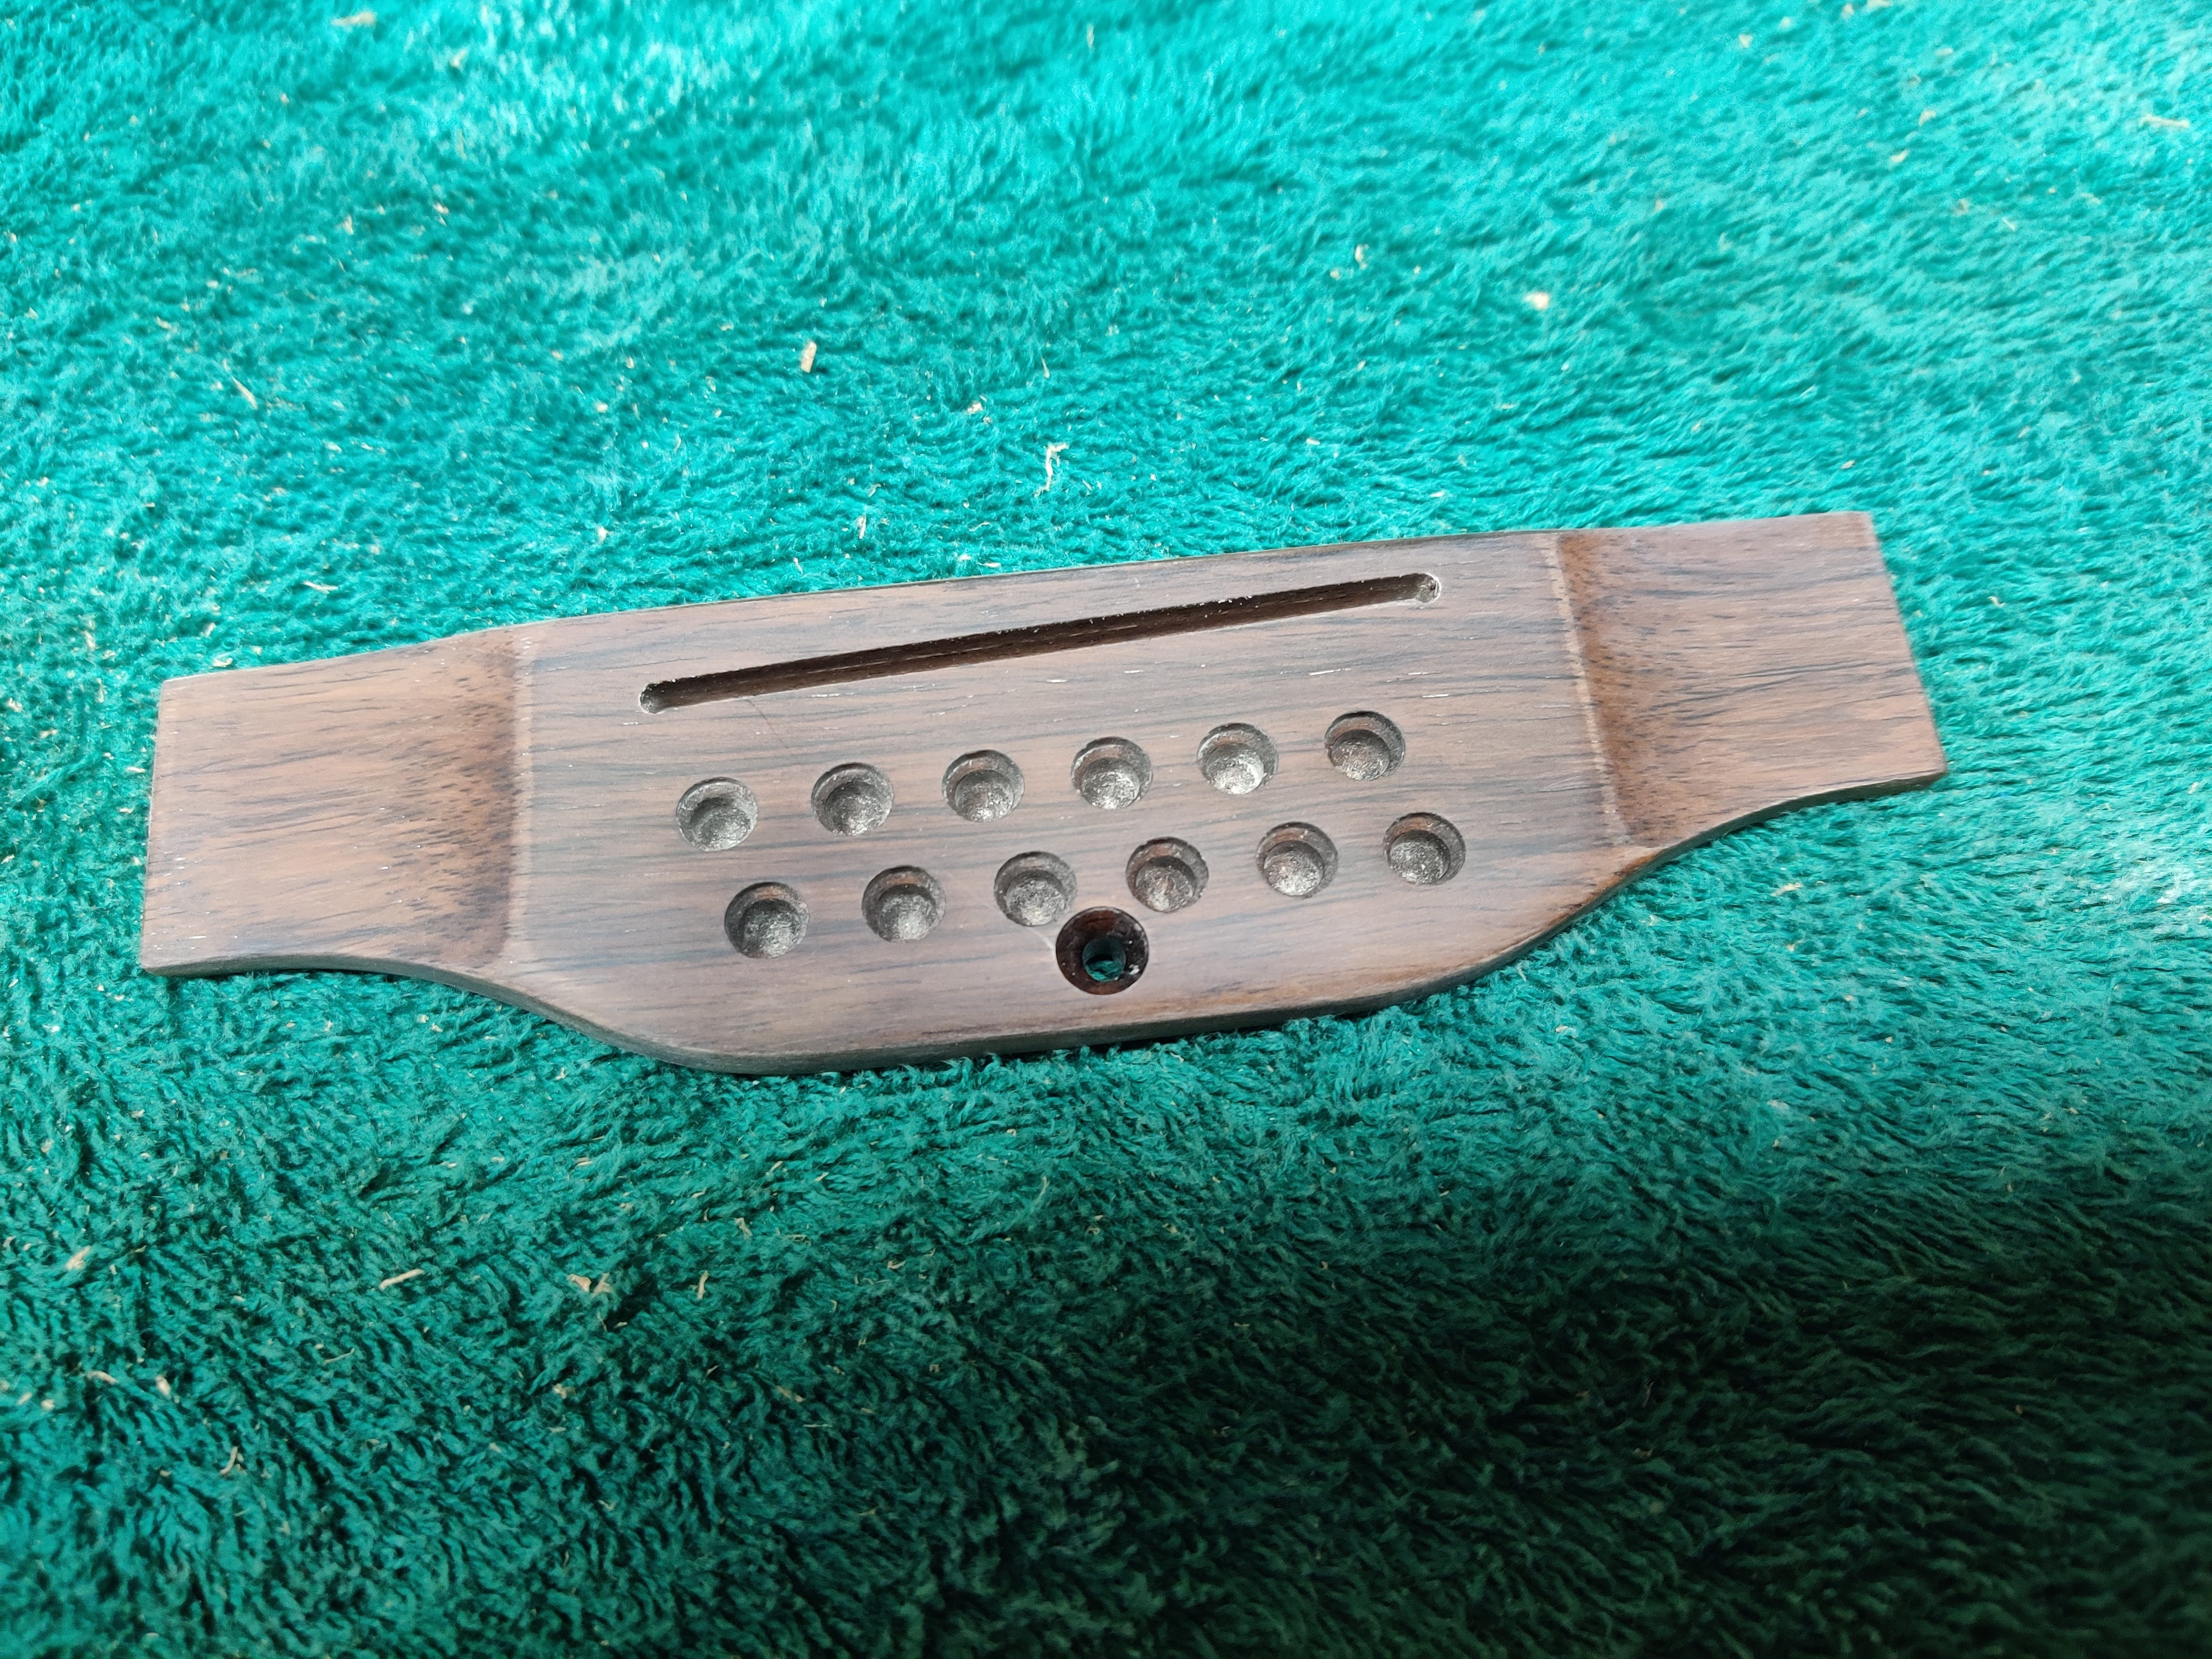
It’s not a 13 string guitar. That hole in the center is for a JLD Bridge Doctor. It installs under the bridge, with a post that joins the bridge to the tail block. I had to take geometry twice in high school just to pass it once, so I can’t really explain it, but if you look at it you can see how it fights the tension trying to pull the bridge forward by making it impossible, or at least very difficult.


But first I had to glue the bridge to the top. So I did. That’s what the silver contraption to the left of the Bridge Doctor is for. You drill two of the string holes, and the bridge gets clamped between the two metal plates. The thumbscrews and small wooden pads are to make sure the ends of bridge get good adhesion. It worked.
So now that the top was dealt with and buttoned up, it was time to start thinking about re-attaching the back. I had inadvertently destroyed the lining, which is what glues the back to the sides.
You can see it in the above photo. The lining is missing along the top because that’s where the guitar had been broken. I decided to remove all the lining from the back and just replace it. It was a good decision, because the lining came out very, very easily. Too easily. I bought some reversed kerf lining, which would add more stiffness to the back and allow me to start fixing the mess I had made of the back.


Luckily for me, the new lining could be clamped with clothespins, and it went pretty easily. The important thing is to make the lining a little higher than the neck block and tail plate. That way you can sand them flush, creating the best possible fit for the back. I glued sandpaper to the back of the melamine shelf to accomplish that. On the right photo above, you can see all the new lining as well as the Bridge Doctor in place.
I tried my best with the break in the top side. I inlaid some rosewood veneer, sanding it off more or less flush. There’s a lot of super glue fill and it’s not pristine, but it’s strong and not noticeable grain-wise. There’s also a sneak peek of the wood binding repair:


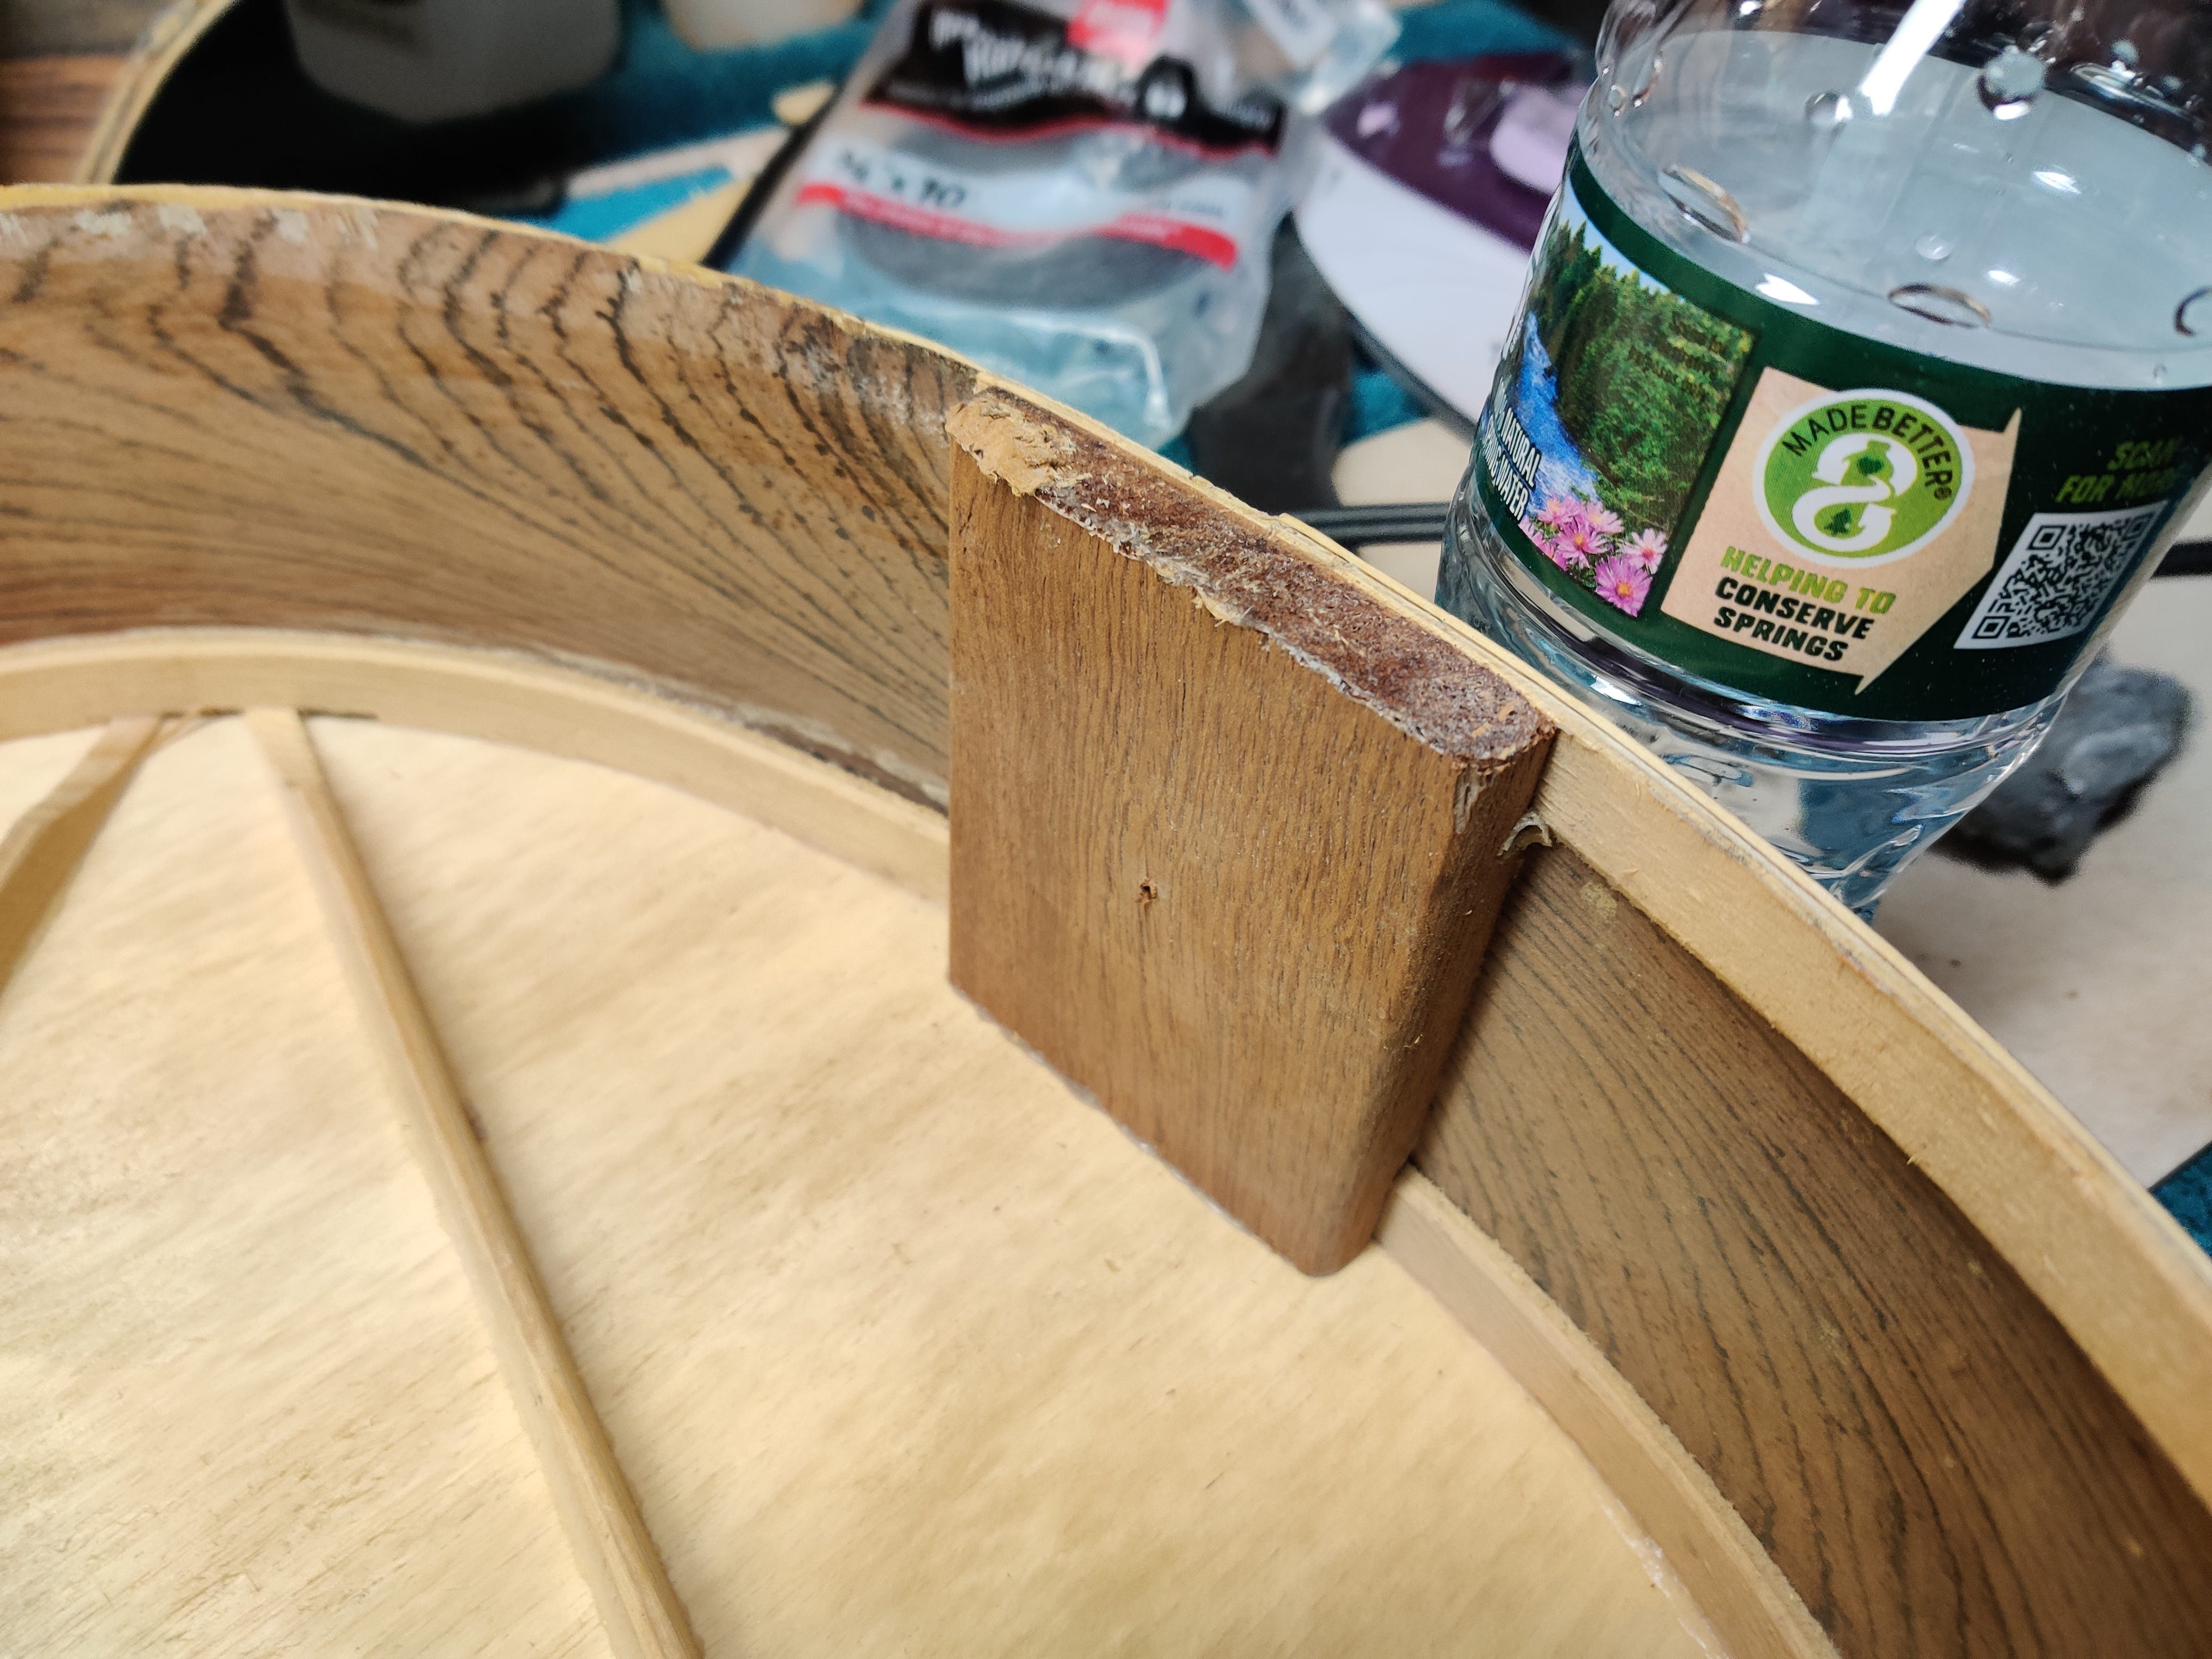
When I had removed the back, I found that one of the braces was broken, and the glue holding it on wasn’t doing much. I was very lucky to spend a day with my old friend and boss who taught me 98% of what I know about woodworking.


He had some quartersawn African mahogany and cut me out a strip to make a new brace. The sides are slightly angled, and I needed to cut the bottom to fit the radius of the back. I used some of the extra brace wood to offset the angles and clamp it in a way that I could cut it. I also taped sandpaper to the place the brace would sit and by slowly sanding the bottom of the brace, I got it to match the curve.


Once it was sanded on the bottom, I glued it in place and carved the ends with a chisel. It’s not perfect, but it’s better than what was there.


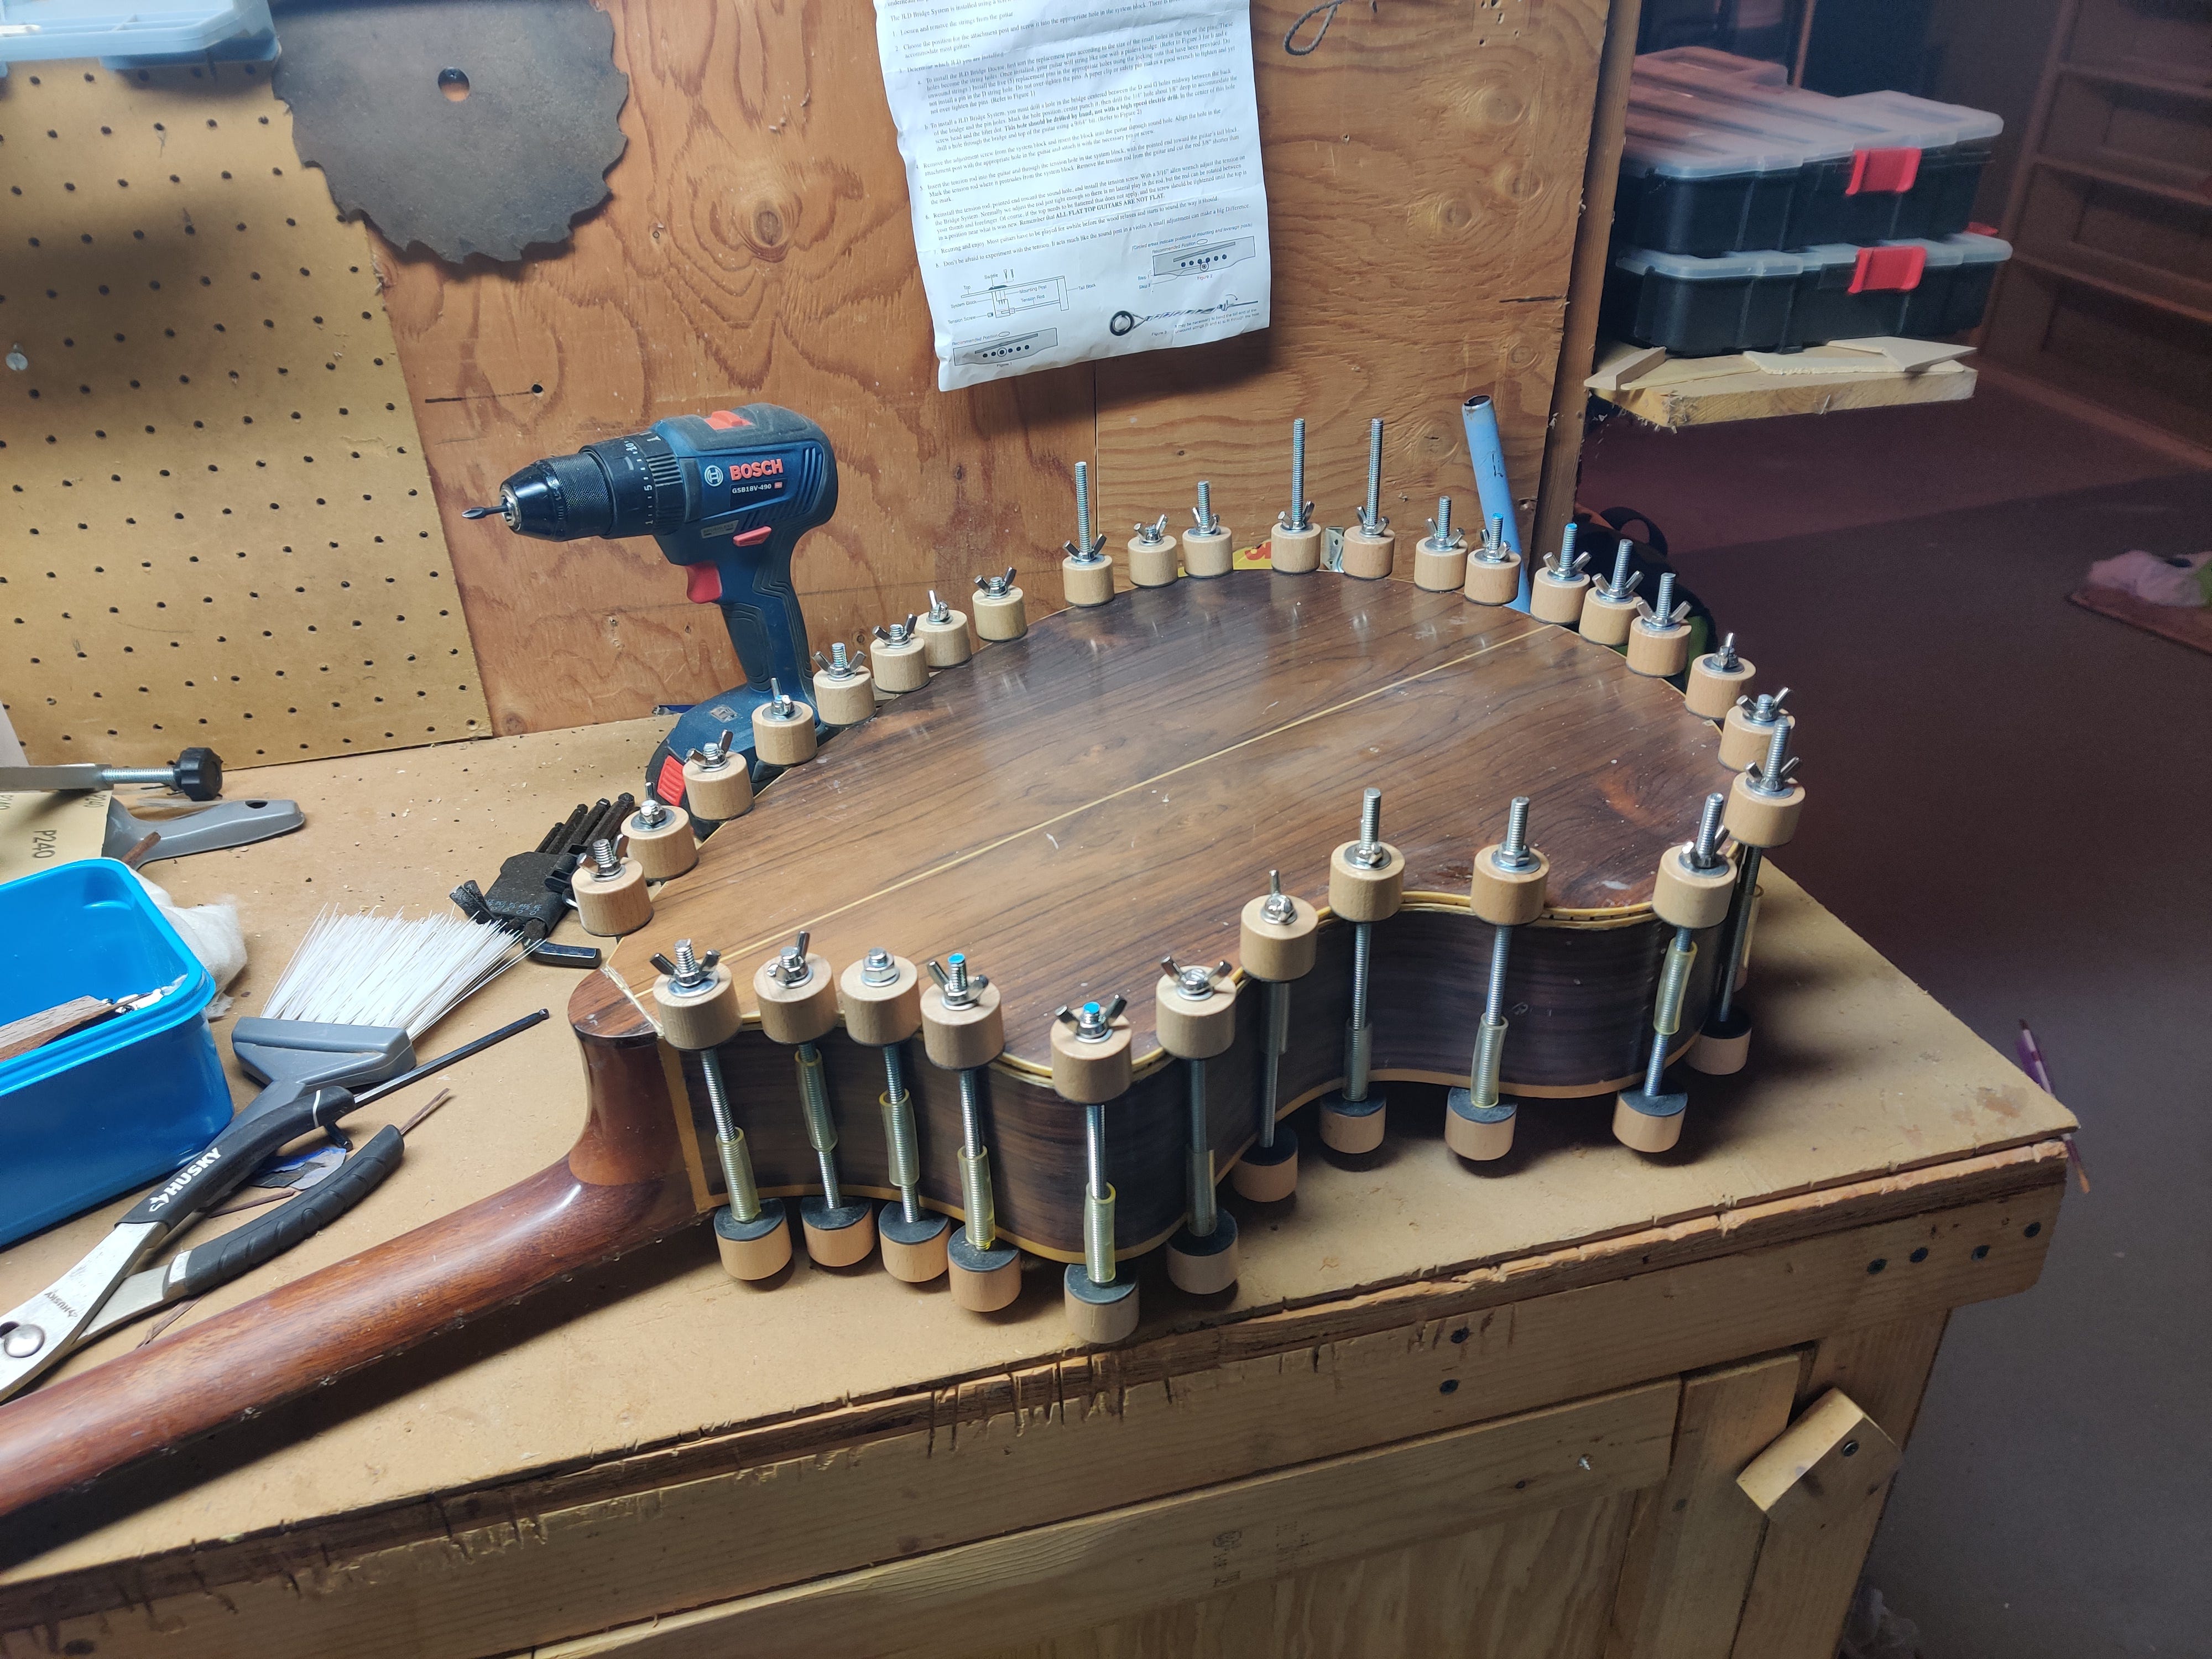
I also re-glued the end of another brace that had lifted. With all of that done, it came time to re-glue the back to the guitar and close it up. I re-glued the back using spool clamps. A lot of spool clamps.
I had to rout away the old binding so I could install new. It was an imperfect process, but I got rid of 90% of it. I used a steam iron and a piece of bent 18 gauge steel as a bending iron for the wood binding. I didn’t get any photos because my hands were full. But I impressed myself, because I had never bent wooden binding successfully before.


A lot of super glue and sanding followed the attachment of the binding. But it fits, it sticks, and it’s better than it was before. Which is really the main theme of this restoration.
At some point in the future, I want to spend some time really working on the finish. It needs it. But at the time I was doing this, I had no free time at all. It’s a miracle I could get it as done as I did. I put the old nut back on, strung it up, and it actually holds tune. I think it sounds pretty good too. It certainly sounds better than when I got it.